
Alternative Photographic Processes: A Guide to Handmade Prints
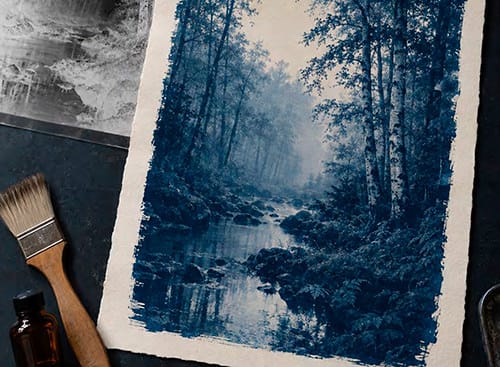
Film vs Digital Negatives for Alternative Contact Printing
Film vs Digital Negatives for Alternative Contact PrintingHow to prepare camera negatives, continuous-tone Kodalith copies,…
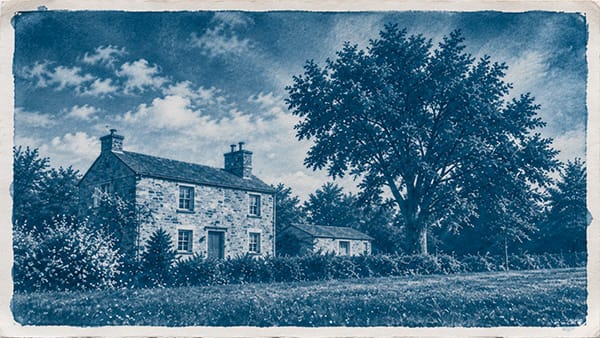
How to Make Cyanotype Prints with Digital Negatives
Cyanotype PrintsWe believe that everyone has the potential to achieve greatness and fulfill their dreams….
Alternative photographic processes turn photographs into objects you make by hand. From the deep blues of cyanotype to the warm tones of salt printing, these methods give paper, chemistry, light, and craftsmanship a visible role in the finished image.
Many originated in the nineteenth century, before flexible film became common. Today, photographers use them with large-format film negatives, digital negatives, and even objects placed directly on light-sensitive paper.
This guide introduces ten alternative photographic processes, explains their distinctive qualities, and helps you choose where to begin.
What Are Alternative Photographic Processes?
Alternative photography is a broad term for historical and experimental methods outside mainstream photographic production. It includes handmade printing processes, camera-less images, and techniques that create photographs on materials such as glass or metal.
The material becomes part of the image. Smooth paper can emphasize fine detail, while textured paper gives a print a more tactile appearance. Hand-applied coatings can leave visible brush marks, although careful technique can also produce clean edges and consistent results.
Alternative photography does not have to look distressed or imperfect. It can be precise, expressive, or a combination of both. The creative opportunity comes from controlling how the image is made.
How Contact Printing Works
Many alternative printing methods use contact printing: a negative rests directly against a light-sensitive surface during exposure.
The negative’s dense areas block more light and produce lighter areas in the print. Clearer areas transmit more light and produce darker tones. A contact frame or suitable glass keeps the negative and paper together to preserve detail.
Because there is no enlargement during exposure, the image on the print is the same size as the image on the negative. An 8 × 10-inch image therefore requires an 8 × 10-inch negative.
Many hand-coated processes use sunlight or a suitable ultraviolet exposure unit. Mike Ware’s practical instructions for alternative printing explain this shared approach.
Can You Use Digital Photographs?
Yes. A digital photograph or scanned film image can become a digital negative printed onto compatible transparency film.
Preparing a successful negative involves more than simply inverting the image. Contrast and ink density must suit the printing process. A negative that works well for cyanotype may need different adjustments for platinum/palladium printing.
This hybrid workflow lets you use Lightroom or Photoshop to prepare an image, then create the final print by hand.
What Is a Photogram?
A photogram is made by placing objects directly on a light-sensitive surface. Leaves, lace, feathers, and translucent materials block or filter the light, creating silhouettes and varying tones.
Photograms offer a straightforward introduction to alternative printing because they require neither a camera nor a photographic negative.
Ten Alternative Photographic Processes to Explore
1. Cyanotype: Distinctive Blue Prints
Cyanotype uses iron-based chemistry to create a Prussian blue image on paper, fabric, or another compatible surface.
The traditional process involves coating the material, drying it away from ultraviolet light, and exposing it beneath a negative or arrangement of objects. Washing removes the unreacted sensitizer, and oxidation deepens the blue.
Cyanotype can produce bold silhouettes, delicate botanical details, and continuous-tone photographs. Paper selection, coating technique, and negative contrast influence the result.
Why try it? Traditional cyanotype is an accessible starting point for learning coating, contact printing, and exposure control. Precoated paper also lets you begin without mixing sensitizer. See Mike Ware’s introduction to traditional cyanotype.
2. Platinum and Palladium Printing: Subtle Tonal Gradation
Platinum and palladium prints are valued for their delicate tonal transitions, matte surfaces, and chemically stable image metals.
Paper is coated with an iron-based sensitizer containing platinum salts, palladium salts, or both. A negative is contact-printed under ultraviolet light, followed by processing and clearing appropriate to the formula.
The metal image forms within the paper’s surface fibers. Color can range from relatively neutral to warm brown, depending on the chemistry and processing.
Why try it? This process suits images that depend on subtle separation of tones, including portraits, landscapes, and still lifes. It rewards careful negative preparation and paper selection.
3. Wet Plate Collodion: Photographs on Glass and Metal
Wet plate collodion belongs to alternative photography, although it is primarily a plate-making and camera process rather than a paper-printing method.
A glass or metal plate receives a collodion coating containing halide salts, then becomes light-sensitive in a silver nitrate bath. The photographer exposes and develops the plate before the coating dries.
The process can produce glass negatives, ambrotypes, and tintypes. Ambrotypes are images on glass viewed against a dark backing; tintypes use a dark metal support.
Wet plate images can be remarkably detailed. Their response to color also differs from modern film and digital sensors, changing how skin, clothing, and other subjects appear.
Why try it? Wet plate offers a distinctive portrait experience and a physical image on glass or metal. Its timing, equipment, and chemical requirements make a supervised workshop a sensible introduction.
4. Salt Printing: Warm Tones and Visible Paper Texture
Salt printing is one of photography’s earliest paper-printing methods, associated with William Henry Fox Talbot.
Paper treated with salt receives silver nitrate, forming light-sensitive silver chloride. The image appears during contact exposure to sunlight or another suitable light source. Subsequent washing, optional toning, fixing, and final washing follow the chosen formula.
Salt prints often have warm brown or reddish tones and an uncoated, matte appearance. The paper’s surface contributes strongly to the image.
Why try it? Salt printing works well when you want the photograph and paper texture to feel closely connected. Negative contrast and thorough processing are especially important.
5. Gum Dichromate Printing: Layered Color and Brushwork
Gum dichromate, also called gum bichromate, combines gum arabic, pigment, and a light-sensitive dichromate.
Ultraviolet exposure through a negative makes the exposed coating less soluble. Water development removes unhardened material, leaving a pigment image.
Artists can build prints through repeated coatings and exposures. Each layer may introduce a different color or change the image’s contrast and detail. Multiple negatives can also produce color images.
Why try it? Gum printing gives photographers considerable control over pigment, layering, and brushwork. Results can range from painterly interpretations to detailed photographs.
Traditional dichromates contain hazardous hexavalent chromium, so this process requires suitable training, handling, and waste collection.
6. Van Dyke Brown Printing: Rich Brown Images
Van Dyke brown is an iron-silver process that produces warm brown photographs.
Its traditional sensitizer contains ferric ammonium citrate, tartaric acid, and silver nitrate. Coated paper is dried, contact-exposed under ultraviolet light, and then processed through washing, fixing, and final washing.
Suitable toning can change the image color and improve its stability. Permanence also depends on correct fixing and thorough washing.
Why try it? Van Dyke brown is a useful next step for photographers interested in hand-coated silver images after working with cyanotype.
7. Anthotype: Images Made with Plant Pigments
Anthotypes use light-sensitive plant pigments extracted from flowers, leaves, fruits, or vegetables.
Paper is coated with the extract and dried. Objects or a positive transparency are placed over it before exposure to sunlight. Exposed pigment fades, while protected areas retain more color.
This reverses the familiar cyanotype relationship: an opaque object generally leaves a darker shape against a lighter background.
Exposures may take days or weeks, depending on the pigment and sunlight. The finished image remains vulnerable to fading.
Why try it? Anthotypes invite experimentation with natural color and slow changes. Photograph or scan successful results, and protect the originals from prolonged light exposure.
8. Bromoil Printing: Photography Finished with Ink
Bromoil begins with a suitable silver gelatin photograph. Bleaching and tanning alter the gelatin according to the original image.
When soaked, different areas absorb different amounts of water. The wetter highlights resist oily ink, while the more hardened shadow areas accept it. The artist gradually builds the image with hand-applied ink. The Historic New Orleans Collection’s bromoil explanation describes this relationship between gelatin, water, and ink.
Why try it? Bromoil offers direct control over texture, contrast, and emphasis during inking. It combines darkroom printing with a hands-on approach similar to printmaking.
9. Polaroid Image Transfers: Soft Color and Irregular Edges
Traditional Polaroid image transfers use compatible peel-apart instant film. Development is interrupted, and the negative portion is pressed against another surface so image-forming dyes transfer to the receiving material.
The result may include muted color, incomplete transfer, and uneven edges.
An emulsion lift is a different technique: it separates the image-bearing layer of a developed instant photograph and places that layer onto another surface.
Why try it? Transfers and lifts suit collage and mixed-media work. Confirm film compatibility before planning a project; ordinary integral instant film does not function like traditional peel-apart transfer materials.
10. Lumen Prints: Sunlight on Photographic Paper
Lumen printing usually involves placing objects on black-and-white photographic paper and exposing it to sunlight.
Instead of developing the paper conventionally, the prolonged exposure creates a visible printing-out image. Depending on the paper, moisture, exposure, and objects, colors can include pink, purple, yellow, and brown.
Leaves and flowers can contribute both shapes and chemical interactions, making the results particularly variable.
Why try it? Lumen printing is a direct way to explore camera-less image-making with photographic paper.
Record the print before fixing if you want to preserve its initial appearance digitally. Fixing often changes the colors and density; an unfixed original remains light-sensitive.
Where Does Pinhole Photography Fit?
Pinhole photography often appears alongside alternative processes because it encourages handmade equipment and deliberate experimentation. However, pinhole describes how an image is captured, not how it is printed.
A tiny opening projects light onto film, photographic paper, or a digital sensor. Exposures are often long, and images have characteristic softness with extensive depth of field.
A pinhole camera can be built from a light-tight box or can. Its negatives can then be used in a separate printing workflow, including alternative printing.
Choosing Your First Alternative Process
Choose according to the kind of image you want to make and the equipment you can support.
| Your creative goal | A process to consider | Main consideration |
|---|---|---|
| Learn contact printing | Traditional cyanotype | Coating and exposure consistency |
| Create botanical images without a camera | Cyanotype photograms or lumen prints | Object contact and light |
| Explore natural pigments | Anthotype | Long exposures and fading |
| Produce warm brown photographs | Salt or Van Dyke brown printing | Negative contrast and silver processing |
| Explore subtle tonal transitions | Platinum/palladium | Materials cost and precise preparation |
| Build images with colored layers | Gum printing | Registration and chemical handling |
| Work directly with photographic ink | Bromoil | Suitable paper and inking practice |
| Make portraits on glass or metal | Wet plate collodion | Training, equipment, and chemistry |
For a first project, I suggest a small cyanotype photogram. It introduces contact, exposure, and washing without requiring a digital negative.
Once you understand those variables, try printing one of your own photographs.
Experiment with Purpose
Unexpected marks can become part of an image, but useful experimentation starts with observation.
Keep notes on the paper, sensitizer, coating method, drying conditions, negative, light source, exposure, and processing. Change one variable at a time when troubleshooting.
Ask whether a mark strengthens the photograph or distracts from it. A visible brush edge may support one image, while another benefits from a clean border and even coating.
The goal is to understand the process well enough to make intentional choices.
Working Safely with Alternative Processes
These descriptions explain how the processes work; they are not complete chemical recipes.
Read the Safety Data Sheets and full instructions for the exact formula you use. Wear suitable gloves and eye protection, label containers, and keep photographic equipment separate from food preparation.
Ventilation and chemical storage must suit the process. Wet plate collodion involves flammable solvents, silver nitrate can cause serious eye and skin injury, and traditional dichromates require particularly careful handling.
Collect hazardous and silver-bearing waste for appropriate disposal. Follow local disposal requirements rather than assuming diluted photographic chemistry is suitable for the drain. Shield ultraviolet exposure equipment to prevent direct eye and skin exposure.
Resources for Learning More
Photographers’ Formulary
A supplier of photographic chemicals, darkroom materials, and alternative-process kits. Consult the instructions and safety information for the specific product you choose.
Visit Photographers’ Formulary
Mike Ware
A technical resource covering traditional and new cyanotype, argyrotype, platinum/palladium, and other iron-based printing processes. Particularly useful for understanding the chemistry behind the image.