A photography studio is much more than a room filled with expensive lights. A properly equipped studio gives photographers the tools to control virtually every aspect of lighting, from the softness of a portrait to the smallest reflection on a glass bottle.
And that takes more than a few strobes and softboxes.
Light stands, boom arms, flags, reflectors, C-stands, background systems, clamps, and countless smaller accessories make the difference between a studio that simply has lights and one that gives the photographer complete control.
The good news? You don’t need to purchase everything at once, and you certainly don’t need to spend thousands of dollars on every piece of equipment.
In this guide, we’ll look at 37 categories of photography studio equipment, organized in order of purchasing importance. Each category includes three price levels:
We’ll also cover where spending more money makes sense, where inexpensive equipment performs just as well, and what you should purchase first.
What this guide covers: Studio flash equipment, modifiers, light stands, grip equipment, seamless paper, backgrounds, tripods, booms, flags, reflectors, remote triggers, accessories, and studio safety.
What it doesn’t cover: Cameras, lenses, computers, editing software, or continuous-light equipment. This guide focuses exclusively on studio photography using strobes.
Pricing note: All prices are approximate U.S. retail prices or planning estimates as of 2026. Equipment configurations, sales, availability, and shipping charges can affect final costs. Use the prices as a purchasing guide rather than guaranteed quotes. Affiliate Links Provided.
Part One: Essential Photography Studio Equipment
These first twelve categories form the foundation of a functional photography studio. If you’re starting from scratch, this is where most of your initial budget should go.
1. Studio Strobes: The Most Important Investment
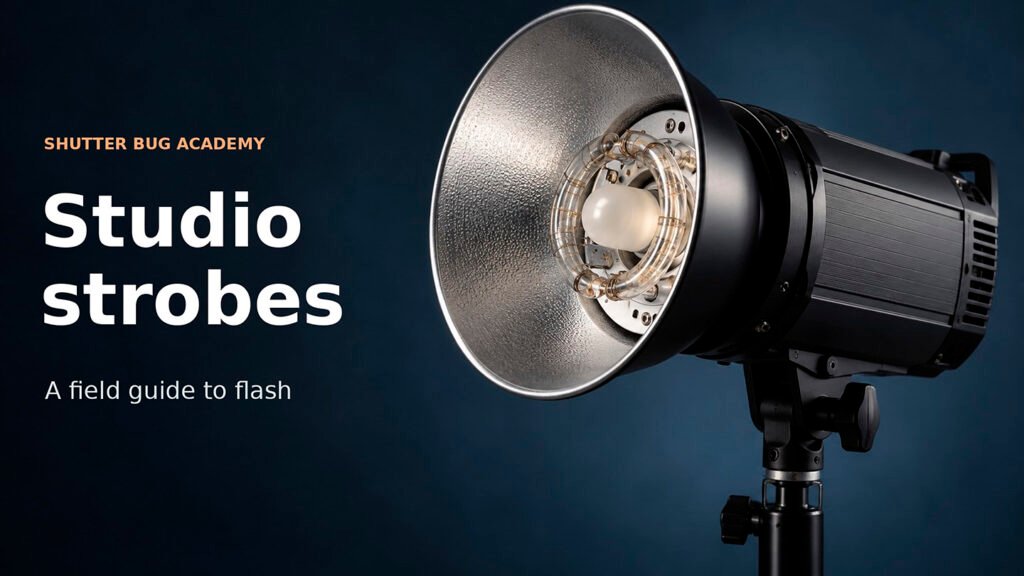
Studio strobes are the foundation of your lighting system. Unlike continuous lights, a strobe releases a brief, powerful burst of light when the camera’s shutter is triggered.
They offer several advantages for studio photography:
- Greater light output for photographing at small apertures.
- The ability to photograph at low ISO settings.
- Excellent control over the balance between flash and ambient illumination.
- The ability to freeze movement, depending on the strobe’s flash duration.
- Consistent and repeatable lighting.
Level | Recommended equipment | Approx. price |
Premium | Profoto D30, 500 Ws-Amazon Affiliate Link | $1,795 |
Midrange | $750 | |
Budget | $179 |
Recommended studio strobes
Premium: Profoto D30
Profoto is a well-established professional lighting manufacturer. The D30 offers an extensive adjustment range, fast recycling, excellent light-shaping accessories, and integration with Profoto’s wireless system.
Its strengths are flexibility, convenience, and a comprehensive professional ecosystem.
The drawback is the cost. Once you commit to the Profoto system, compatible accessories and additional lights can become expensive.
Midrange: Paul C. Buff LINK
Paul C. Buff has long been a popular choice among studio photographers looking for substantial power without premium European pricing.
The LINK offers 800 watt-seconds, TTL capability, high-speed sync, and support for both AC and compatible battery power arrangements.
Its primary advantages are strong output, flexibility, and U.S.-based manufacturer support.
One consideration is the company’s modifier and triggering ecosystem, which isn’t directly interchangeable with every other manufacturer’s equipment.
Budget: Godox SK400III-V
The Godox SK400III-V offers considerable flash output for a very reasonable price.
It includes wireless integration with the Godox X system and uses the popular Bowens S modifier mount.
However, it has a more limited minimum-power setting, comparatively basic controls, and performance limitations that become more noticeable when photographing fast-moving subjects.
My advice: For most portrait studios, begin with two lights. One provides your main illumination and the second can serve as a fill, rim, hair, or background light.
You can accomplish a surprising amount with two strobes and a reflector. A third light is helpful, but I would purchase better modifiers and support equipment before automatically buying more lights.
Don’t choose a strobe based on watt-seconds alone. Power adjustment range, recycling time, t.1 flash duration, consistency, repair options, and modifier compatibility all deserve consideration.
2. Wireless Flash Triggers
A wireless trigger allows the camera to fire the strobes without connecting everything through sync cables.
More advanced transmitters also let you change flash power remotely, assign lights to groups, and access features such as TTL and high-speed sync when supported.
Level | Recommended equipment | Approx. price |
Premium | $399 | |
Midrange | $170 | |
Budget | $89 | |
Universal (Great Choice) | $195 |
Tradeoffs: Premium transmitters generally offer more sophisticated integration and controls. Budget transmitters are often excellent, but must match the strobes and your camera system.
An important consideration is compatibility. Profoto Air, Paul C. Buff CyberSync, and Godox X are different systems. You cannot assume one brand’s radio trigger will control another brand’s lights. Pocket Wizard is my choice for non-TTL remotes. You can use these to trigger cameras and lights in stadiums or just about anywhere.
For mixed lighting systems, universal triggering may be possible through compatible receivers and sync connections, but remote power control and advanced features may be unavailable.
3. Light Stands
A good light stand is one of the most overlooked studio purchases
- Adequate load capacity.
- Stable leg construction.
- Reliable locking mechanisms.
- Air-cushioned sections where appropriate. (A must!)
- Sufficient maximum height.
- Durable metal hardware.
You might replace your strobes every several years, but a well-made stand can last decades.
Level | Recommended equipment | Approx. price |
Premium | $180 | |
Midrange | Impact air-cushioned stand | $70–110 |
Budget | $40–70 |
Tradeoffs: The major difference is usually build quality, stability, and durability rather than photographic performance.
A budget stand can be perfectly adequate for a small strobe and umbrella. It becomes less appealing when you mount a heavy head and a large octabox several feet above a subject.
Recommendation: Purchase stands rated for more weight than your typical lighting setup. Always consider the combined weight and leverage of the light, bracket, and modifier.
4. Sandbags and Stand Weights
Sandbags are inexpensive safety equipment that every studio should own.
They help prevent stands from tipping, particularly when using large softboxes, booms, umbrellas, or equipment positioned high above the floor.
Level | Recommended equipment | Approx. price |
Premium | $35–55 | |
Midrange | Impact filled sandbag-Amazon Affiliate Link | $20–35 |
Budget | $12–25 |
The main tradeoffs are construction quality, stitching, closures, and longevity.
A basic sandbag can perform just as well as an expensive one if it is properly filled, securely constructed, and appropriately positioned.
Recommendation: Begin with at least four sandbags in a two-light studio and purchase additional weights as you add grip equipment.
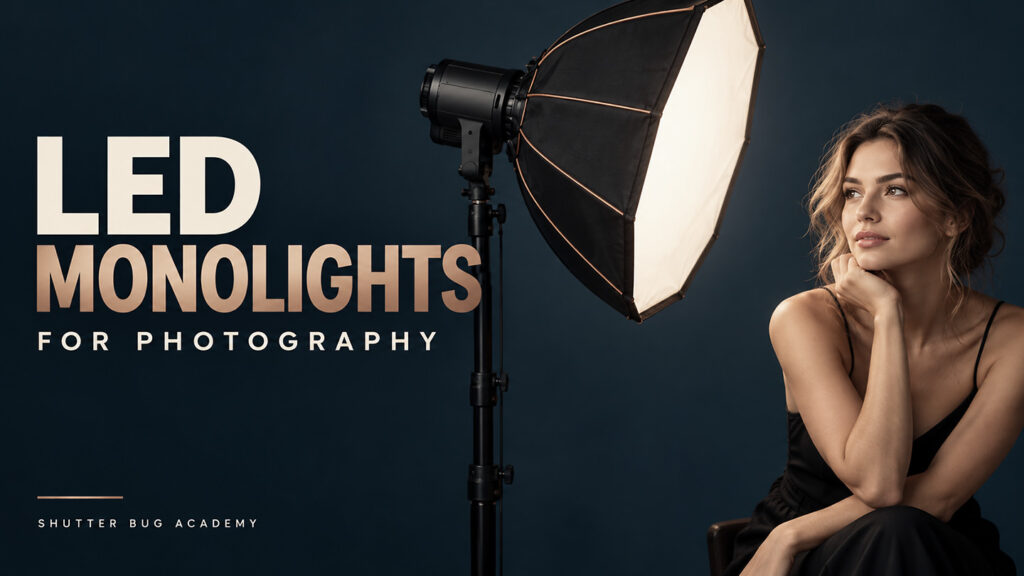
5. Softboxes and Octaboxes
Softboxes are among the most versatile modifiers in photography.
They enlarge the apparent size of the light source, creating softer shadow transitions when placed close to the subject relative to its size.
A rectangular softbox is especially versatile for portraits and products. An octabox creates a more rounded illumination pattern and reflection that many portrait photographers find appealing.
Level | Recommended equipment | Approx. price |
Premium | $449 | |
Midrange | $210 | |
Budget | $119 |
Tradeoffs: More expensive softboxes generally offer more durable materials, convenient setup, stronger rods or frames, and dependable construction.
However, a budget softbox with appropriate diffusion can produce extremely similar light to a much more expensive alternative of comparable shape, size, and placement.
Remember to verify the mounting system. Some modifiers also require a separately purchased speed ring or insert.
Recommendation: Begin with a 36-inch octabox or a medium rectangular softbox. Add a grid when you need tighter control over spill.
6. Umbrellas
Umbrellas are inexpensive, portable, easy to set up, and extremely useful.
White reflective umbrellas produce broad light with a generous spread. Shoot-through umbrellas create soft illumination but can spill light across the studio. Silver umbrellas generally create stronger specular reflections and can be more efficient.
Level | Recommended equipment | Approx. price |
Premium | $100–180 | |
Midrange | $119 | |
Budget | $20–40 |
Tradeoffs: Premium umbrellas are generally more robust, with better fabrics and support ribs. Budget umbrellas can still produce beautiful light.
For a beginner, a $30 white umbrella is one of the best values in studio lighting. The price is right but if you can afford a soft box get that instead.
The limitation is spill control. An open umbrella generally illuminates more of the surrounding studio than a gridded softbox. I am a fan of a white interior.
7. Collapsible Reflectors
A reflector redirects existing light without requiring another strobe.
White reflectors create gentle fill, silver reflectors produce more intense and specular reflections, and black surfaces reduce unwanted fill by blocking reflected light.
A five-in-one reflector usually offers several interchangeable surfaces, making it especially useful in a small studio.
Level | Recommended equipment | Approx. price |
Premium | $150 | |
Midrange | $40–90 | |
Budget | $20–35 |
Tradeoffs: The difference is primarily durability, frame rigidity, and convenience.
In terms of light quality, an inexpensive white reflector can be every bit as useful as an expensive one.
Buy a dedicated holder or support arm if you regularly work without an assistant.
8. Background Support Systems
Backgrounds need a reliable support system.
There are two primary options: portable background stands with crossbars, and permanent wall- or ceiling-mounted systems.
Level | Recommended equipment | Approx. price |
Premium | $224.80 | |
Midrange | $415 | |
Budget | $90–170 |
A permanent system is often the best option for a dedicated studio. It frees up floor space, reduces setup time, and lets you switch background rolls quickly.
Portable systems are excellent for smaller studios and location work.
Tradeoffs: Budget systems can bow under the weight of large paper rolls. Premium systems offer better rigidity and durability.
For permanent systems, make sure the wall or ceiling structure and mounting hardware can safely support the full load.
9. Seamless Background Paper
Seamless paper is one of the most practical studio background materials.
It provides a smooth, consistent surface that can extend from the background down onto the floor.
Popular colors include:
- Super White
- Black
- Fashion Gray
- Thunder Gray
- Bone
- Beige
- Various colors for creative portraits
Level | Recommended equipment | Approx. price |
Full-width studio option | $77–100 | |
Intermediate option | Savage 86-inch roll-Amazon Affiliate Link | $65–100 |
Compact option | $45 |
These are size-based purchasing options rather than differences in quality.
A 53-inch roll is useful for headshots, tabletop photography, and tight portraits. For full-length photographs, groups, and subjects that move, a 107-inch roll is much more practical.
Recommendation: Begin with white, gray, and black. Three neutral backgrounds are more versatile than purchasing a dozen novelty colors.
Remember that seamless paper is a consumable. Dirty or damaged sections are cut off and discarded, and shipping for large rolls can be expensive.
10. Power Cords, Extension Cables, and Cable Protection
Cable management may not be exciting, but it is essential in a working photography studio.
You’ll need suitable power cords, grounded extension cables where applicable, cable ties, gaffer tape, and floor cable protection.
Level | Equipment allowance | Approx. price |
Premium | Professional electrical and cable-management kit | $150–250 |
Midrange | Quality grounded cables and cable accessories | $75–150 |
Budget | Basic appropriately rated cable kit | $40–80 |
Never select cords based solely on price. Match the cable’s electrical rating, length, and intended use to the equipment. Avoid overloaded circuits and inexpensive, inappropriate adapters.
Tape down or protect cables that cross walkways. Gaffer tape is preferred over ordinary duct tape for temporary photography work because it is intended to remove more cleanly.
11. Handheld Flash Light Meter
A handheld incident flash meter is an extremely useful tool for studio photography.
Instead of guessing at exposure from the camera’s reflected-light reading, an incident meter measures the illumination reaching the subject.
It also allows you to measure individual lights and establish repeatable lighting ratios.
Level | Recommended equipment | Approx. price |
Premium | $689 | |
Midrange | $419 | |
Budget | $269 |
Tradeoffs: Higher-end meters add features such as spot metering, more sophisticated controls, and flash-duration measurement. Budget meters are perfectly capable of measuring manual studio flash exposure.
For most photographers, the L-308X-U provides the fundamental features needed to work with strobes.
A flash meter isn’t strictly necessary to begin shooting digitally, but it makes studio lighting more predictable and is especially valuable when learning lighting ratios.
12. Clamps and Basic Grip Hardware
Grip equipment is the collection of clamps, pins, brackets, arms, and mounts that helps position lighting accessories.
A few reliable clamps can solve problems that would otherwise require buying another stand.
Level | Recommended equipment | Approx. price |
Premium | Matthews or Kupo basic grip kit | $150–300 |
Midrange | Impact and Manfrotto grip hardware | $70–150 |
Budget | Heavy-duty spring clamps and mini clamps-Affilitate Link | $25–60 |
For a new studio, I would begin with several A-clamps, two super clamps, a reflector holder, and a small selection of mounting pins.
Buy equipment with appropriate load ratings. A lightweight spring clamp should never be treated as a substitute for a proper grip head or professionally rated mounting system.
Part Two: Advanced Lighting Control and Studio Grip Equipment
Once the basic studio is operational, the next purchases should focus on controlling where light goes — and, just as importantly, where it doesn’t.
13. C-Stands and Grip Arms
A C-stand is a heavy-duty support commonly used for positioning flags, diffusion panels, reflectors, and accessories.
Unlike a conventional light stand, a C-stand can support an offset grip arm for accurate positioning.
Level | Recommended equipment | Approx. price |
Premium | Matthews 40-inch C+ Stand Kit-Affiliate Link | $330 |
Midrange | Kupo 40-inch C-stand kit-Affiliate Link | $250 |
Budget | Neewer C-stand kit-Affiliate Link | $187 |
Why purchase one?
C-stands are particularly useful for holding flags close to a subject, positioning small bounce cards, or supporting overhead diffusion.
Tradeoffs: The biggest differences are the quality of the base, locks, grip head, arm, and overall construction.
A properly rated C-stand can be a lifetime purchase.
However, an ordinary grip arm is not automatically a safe boom for a heavy strobe. Always follow the manufacturer’s load ratings and counterweight recommendations.
14. Softbox Grids
A fabric grid, sometimes called an eggcrate, attaches to the front of a compatible softbox.
Its purpose is to restrict the spread of light and reduce unwanted spill while retaining much of the softbox’s broad source character.
Level | Recommended equipment | Approx. price |
Premium | Profoto fabric grid-Affiliate Link | $99–200 |
Midrange | Westcott or Chimera grid-Affiliate Link | $70–130 |
Budget | Godox or Neewer grid-Affiliate Link | $20–50 |
This becomes valuable when you need a soft key light without illuminating the background or nearby walls.
The main tradeoff is durability and fit. Make sure the grid is designed for the exact softbox or compatible attachment system you own.
15. Strip Softboxes
A stripbox is a long, narrow softbox often used to create controlled rim lighting or long reflections.
Typical sizes include 12 × 36 inches and 12 × 48 inches.
Stripboxes are especially useful for:
- Rim lighting portraits.
- Fashion photography.
- Defining the edges of a product.
- Creating narrow, controlled reflections on reflective surfaces.
- Illuminating glassware.
A grid makes a stripbox even more versatile.
16. Flags, Cutters, Dots, and Fingers
These are some of the most important tools in commercial photography.
Flags are opaque surfaces placed between a light source and a subject, background, or camera to block unwanted illumination.
Cutters are narrow flags. Dots and fingers are small flags used to make precise adjustments when photographing small objects.
Level | Recommended equipment | Approx. price |
Premium | Matthews professional flag kit-Affiliate Link | $610 |
Midrange | $150–350 | |
Budget | Black foamcore and small flags | $20–70 |
Where should you start?
Purchase several sheets of black foamcore before buying an expensive professional flag kit.
Foamcore is inexpensive, easy to cut, and extremely effective at blocking light.
The advantage of professional flags is their rigid frames, durability, predictable dimensions, and dependable grip mounting.
For anyone interested in photographing reflective products, flags are not optional for long.
17. V-Flats and Large Bounce Cards
A V-flat consists of two large panels hinged together so they can stand in a V-shaped configuration.
White surfaces reflect light and can provide a large area of soft fill. Black surfaces absorb and block reflected illumination, making them useful for negative fill.
Level | Recommended equipment | Approx. price |
Premium | V-FLAT WORLD Foldable 2.0 | $240 each |
Midrange | Rigid black-and-white foam board | $60–110 |
Budget | DIY foamcore V-flat | $20–50 |
For portrait photography, a white V-flat can replace the need for an additional fill light.
For product photography, black cards are equally important. They can create controlled dark reflections that define the shape of a transparent or glossy object.
My advice: Build a few inexpensive V-flats before investing in collapsible commercial versions.
18. Light Booms and Counterweights
A boom arm allows a light or modifier to extend horizontally over a subject.
This is useful for overhead product lighting, beauty lighting, and positioning a hair light without placing a stand directly behind the subject.
Level | Recommended equipment | Approx. price |
Premium | Avenger or Matthews heavy-duty boom-Affiliate Link | $450–900 |
Midrange | Manfrotto or Westcott boom | $200–450 |
Budget | $80–180 |
Tradeoffs: Premium boom systems offer greater rigidity, extension, and load capacity. Less expensive versions can work well with smaller lights, but are more limited in their safe operating range.
The stand and counterweight may need to be purchased separately.
Never place a heavy lighting setup over a subject without a properly rated stand, boom, mounting assembly, and counterweight.
19. Studio Tripods and Heads
A tripod is useful for much more than long exposures.
In a studio, it provides consistent composition, accurate framing, and repeatable positioning.
It is especially important when photographing products, architectural subjects, composites, focus-stacked images, and carefully arranged still life.
Level | Recommended equipment | Approx. price |
Premium | $900–1,800 | |
Midrange | Manfrotto 055 tripod Geared Head-Affiliate Link | $500+ |
Budget | Slik PRO 700DX with head-Affiliate Link | $200 |
A geared head provides especially precise composition adjustments for commercial product photography.
For studio use, stability and accurate positioning are generally more important than minimizing weight.
20. Beauty Dishes
A beauty dish is a relatively shallow, usually round modifier with a central deflector that prevents a direct hotspot from the flash tube.
It creates a distinctive quality of light that can combine defined shadows with smooth tonal transitions.
Beauty dishes are frequently used for fashion, beauty, editorial portraits, and headshots.
The material, shape, depth, and central deflector design influence the lighting pattern.
A white interior generally creates less specular reflection than a silver interior of comparable design.
21. Color Gels and Diffusion Materials
Gels are used to modify the color or characteristics of a light source.
Creative gels can create colored backgrounds, hair lights, or accents. Color-correction gels allow you to change the color temperature or tint of a light.
Level | Recommended equipment | Approx. price |
Premium | Rosco Gels-Affiliate Link | $100–250 |
Midrange | Assorted photographic gel kit | $40–100 |
Budget | Small photographic gel sheets | $15–40 |
High-quality gels provide more predictable color and transmission characteristics.
Use materials rated for the temperature and installation involved. Modeling lamps and flash tubes can become hot, and gels should not be allowed to touch them.
22. Snoots, Barn Doors, and Grids
These accessories control the distribution of light from a studio strobe.
Snoots produce a relatively narrow beam.
Barn doors block light from selected directions.
Reflector grids restrict beam spread to a specified angle or range.
Level | Recommended equipment | Approx. price |
Premium | Profoto light-shaping accessories | $300–600 |
Midrange | Paul C. Buff or Westcott accessories | $100–250 |
Budget | Godox Bowens-compatible accessory kit | $35–100 |
These tools are useful for background spots, selective hair lighting, highlighting products, and creating more dramatic portrait lighting.
Budget accessories are often sufficient for occasional use, but quality and mounting reliability become more important when equipment is adjusted constantly.
23. Scrims and Large Diffusion Frames
A scrim is a diffusion surface placed between a light and the subject.
A large diffusion frame can turn a relatively small strobe into a much broader apparent light source.
Level | Recommended equipment | Approx. price |
Premium | Westcott Scrim Jim or Matthews system | $400–900 |
Midrange | Framed diffusion kit | $150–350 |
Budget | Diffusion fabric with DIY frame | $40–120 |
This technique is particularly valuable for photographing glass, polished metal, jewelry, and other reflective surfaces.
A large diffusion panel can create a smooth, continuous reflection that is difficult to reproduce with a small modifier.
The tradeoff with DIY systems is convenience and rigidity. Always use stable, adequately rated supports.
Part Three: Backgrounds, Product Photography, and Studio Accessories
The remaining categories expand the studio’s capabilities. Some are essential for commercial photographers, while others are useful for maintaining an efficient workspace.
24–29. Additional Support and Background Equipment
Priority | Equipment | Premium | Midrange | Budget |
24 | Rolling light stands | Avenger/Matthews, $350–700 | Kupo/Impact, $180–350 | Neewer, $100–180 |
25 | Product shooting table | Manfrotto, $500–1,000 | Impact, $170–350 | Portable table, $70–150 |
26 | Acrylic and reflective surfaces | Premium acrylic, $150–350 | Cut-to-size acrylic, $60–150 | Small sheets, $15–50 |
27 | Fabric and canvas backgrounds | Hand-painted canvas, $400–1,200+ | Canvas/muslin, $100–350 | Basic muslin, $30–90 |
28 | Collapsible backgrounds | Lastolite/Manfrotto, $200–350 | Westcott, $110–200 | Neewer, $50–100 |
29 | Background roll holders | Manfrotto Expan, $145+ per roll | Metal holder kit, $75–140 | Manual system, $40–90 |
Rolling light stands are useful in permanent studios where lights are moved frequently. Higher-quality versions have more durable casters, effective wheel locks, and better load capacities. Lockable wheels don’t eliminate the need for appropriate counterweights and safe placement.
Product shooting tables provide a smooth surface or sweep suitable for commercial product photography. Larger and more rigid tables offer greater flexibility with heavier or larger subjects.
Acrylic surfaces create clean reflections and can be useful for cosmetics, jewelry, electronics, and packaging. Quality differences include thickness, clarity, surface finish, and scratch resistance.
Canvas backgrounds offer a richer, more textured alternative to seamless paper. Premium hand-painted canvas backgrounds can cost hundreds of dollars, but they may be used for years.
Collapsible backgrounds are particularly convenient for headshots and location portraiture.
Background roll holders simplify the handling and changing of multiple seamless paper rolls. Permanent systems are a significant convenience in busy portrait studios.
30–37. Additional Studio Equipment
Priority | Equipment | Premium | Midrange | Budget |
30 | Apple boxes and posing blocks | Matthews/Kupo, $150–300 | Impact, $70–150 | Basic boxes, $30–80 |
31 | Posing stools and seating | Professional studio stool, $200–450 | Adjustable stool, $80–180 | Basic stool, $35–80 |
32 | Precision grip equipment | Matthews/Kupo, $200–450 | Manfrotto/Impact, $80–200 | Generic grip assortment, $25–90 |
33 | Optical snoot/projector | Professional optical unit, $500–1,200 | Bowens-compatible unit, $180–450 | Entry unit, $90–200 |
34 | Color and gray reference targets | Calibrite system, $150–300 | Standard ColorChecker, $80–150 | Gray card, $15–40 |
35 | Studio carts and storage | Professional grip cart, $400–1,000 | Utility cart, $120–300 | Shelving and bins, $40–120 |
36 | Spare flash tubes and parts | Manufacturer spares, $150–400+ | Genuine compatible spares, $50–180 | Budget-head spares, $20–100 |
37 | Ceiling rails and pantographs | Professional installation, $2,000–6,000+ | Modular system, $800–2,000 | Approved fixed mounts, $150–500 |
Apple boxes and posing blocks: Useful for changing subject height, supporting props, creating levels in product arrangements, and positioning subjects during portrait sessions.
Posing stools: An adjustable stool helps create consistent seated portraits and headshots. Stable construction matters more than appearance.
Precision grip equipment: Additional articulating arms, grip heads, baby pins, clamps, and mounting components allow increasingly precise light placement.
Optical snoots: Unlike ordinary snoots, optical projection attachments can create defined shapes and patterns using lenses and internal masks or gobos. These are useful for specialized portrait and commercial work.
Color and gray reference targets: Help establish repeatable exposure, white balance, and color references. A neutral gray card is not the same as a multi-patch ColorChecker, which provides a broader color reference.
Studio carts: Keep equipment organized and prevent the floor from becoming a storage area for clamps, cables, modifiers, and other accessories.
Spare equipment: A failed trigger, flash tube, cable, or fuse can interrupt an entire client session. Spare accessories are insurance against lost time.
Ceiling-mounted systems: Rails and pantographs can reduce floor clutter and provide convenient lighting positions in permanent studios. These should be engineered and installed for the actual equipment loads and building structure.
Part Four: The Small Studio Accessories Everyone Forgets
Some of the most useful accessories in a photography studio cost less than $30.
They aren’t exciting purchases, but they solve problems almost every photographer encounters.
Equipment | Approx. price | Primary use |
Gaffer tape | $18–35 per roll | Securing cables and marking positions |
A-clamps | $20–70 per assortment | Securing paper, fabrics, and reflectors |
Super clamps | $25–45 each | Mounting equipment on rated supports |
Grip heads and baby pins | $15–65 each | Attaching flags and grip accessories |
Black and white foamcore | $10–40 per sheet | Bounce cards and negative fill |
Velcro cable ties | $10–25 per pack | Cable management |
Cable ramps | $25–100 | Protecting cables in walkways |
Background clamps | $10–30 per set | Securing backgrounds |
Paper tape | $10–25 | Securing seamless paper to floors |
Paper storage clips | $10–30 | Keeping rolls tightly wound |
White gloves and microfiber cloths | $10–30 | Handling polished products |
Monofilament and mounting putty | $10–35 | Positioning lightweight products |
Small mirrors and silver cards | $15–70 | Creating precise highlights |
Acrylic support blocks | $15–60 | Elevating products |
Tabletop flags and articulating arms | $30–120 | Controlling reflections |
Counterweights | $25–80 each | Balancing rated booms |
Studio fan or wind machine | $40–350 | Adding movement to hair and fabric |
Step stool or ladder | $50–200 | Accessing elevated equipment |
First-aid kit and suitable extinguisher | $50–150 | Studio safety |
One of my favorite inexpensive studio accessories is a piece of black foamcore.
With a few pieces of black and white foamcore, you can control highlights, block unwanted reflections, create negative fill, and refine lighting on complicated subjects.
It is difficult to find another studio accessory that offers so much flexibility for so little money.
Part Five: How Much Does a Photography Studio Cost?
Let’s put the equipment into perspective.
The following examples assume a basic two-light studio suitable for portraits, headshots, and general studio photography.
Each includes two strobes, a compatible trigger, stands, sandbags, a primary modifier, a secondary modifier, a reflector, a background system, seamless paper, basic accessories, and a flash meter.
Sample Two-Light Studio Budget
Equipment | Budget | Midrange | Premium |
Two studio strobes | $358 | $1,500 | $3,590 |
Wireless trigger | $89 | $170 | $399 |
Two light stands | $100 | $200 | $360 |
Four sandbags | $80 | $100 | $180 |
Main softbox | $119 | $210 | $499 |
Secondary modifier | $30 | $100 | $150 |
Reflector | $30 | $60 | $160 |
Reflector holder | $35 | $80 | $100 |
Background support | $130 | $354 | $500 |
Two seamless rolls | $154 | $154 | $154 |
Foamcore and bounce cards | $30 | $40 | $100 |
Electrical and tape kit | $65 | $110 | $180 |
Basic clamps | $25 | $50 | $100 |
Flash meter | $269 | $419 | $689 |
Estimated total | $1,514 | $3,547 | $7,161 |
These estimates exclude sales tax, shipping, furniture, tripods, specialty accessories, and permanent studio installation.
Actual costs can be lower if you purchase compatible lighting kits or used equipment.
Budget Studio: Approximately $1,500
A budget studio can produce professional-quality photographs.
The biggest compromises are typically convenience, build quality, flexibility at very low flash powers, and certain advanced features.
This is an excellent starting point for someone learning studio lighting or working with a limited investment.
Midrange Studio: Approximately $3,550
For many working photographers, this is the sweet spot.
You can purchase dependable lighting, quality stands, versatile modifiers, and equipment that will withstand regular use.
It is a particularly sensible option for a small commercial portrait studio.
Premium Studio: Approximately $7,160
Premium equipment generally provides a more refined working experience, extensive accessory options, and strong integration within a manufacturer’s ecosystem.
For photographers working daily with paying clients, efficiency, repeatability, manufacturer support, and durability can justify the investment.
However, premium lighting equipment does not automatically produce better photographs.
The photographer’s understanding of light is still the most important factor.
Part Six: Where Should You Spend More Money?
Not every piece of photography equipment deserves the same percentage of your budget.
Here is where I would spend more and where I would save.
Worth spending more on | Where budget equipment often works well |
Dependable studio strobes | White reflectors |
Quality light stands | Black and white foamcore |
Heavy-duty booms | Basic umbrellas |
C-stands and grip heads | Seamless paper |
Reliable remote triggers | Simple color gels |
Primary modifiers used constantly | Posing props |
Electrical equipment | DIY V-flats |
Flash meter | Small flags and bounce cards |
Choose Your Lighting System Carefully
Before purchasing a collection of modifiers, consider the mounting system used by your strobes.
Godox and many other manufacturers use the Bowens S mount on numerous studio products.
Profoto uses its own mounting ecosystem, while Paul C. Buff and Elinchrom have different mounting arrangements.
Adapters exist for some combinations, but they can add cost, length, weight, or limitations.
Using a common modifier mount throughout the studio can reduce long-term accessory costs, especially if you eventually add more lights.
Consider Buying Used Equipment
Light stands, C-stands, grip equipment, booms, backgrounds, and even some modifiers are excellent candidates for purchasing used.
Well-built grip equipment can remain useful for decades.
Used strobes can also offer significant savings, but inspect them carefully.
Check the condition of the flash tube, power adjustment, recycling performance, modeling lamp, electrical connections, controls, and availability of replacement parts.
Don’t assume that an older high-end strobe is automatically better than a newer midrange unit.
Understand Flash Duration
Not every studio strobe is suitable for freezing fast movement.
When comparing strobes for action, consider their published t.1 flash-duration specifications.
The t.1 measurement describes the time during which flash output remains above ten percent of its peak. This provides a more useful indication of motion-freezing ability than the less demanding t.5 measurement.
Some inexpensive strobes are perfectly suited to photographing stationary portraits but perform poorly when attempting to freeze splashing liquids, flying hair, or fast action.
Remember That Light Control Matters More Than Light Quantity
It is tempting to purchase four or five strobes before learning to use two effectively.
I would recommend the opposite.
A studio with two well-positioned strobes, good modifiers, flags, reflectors, and a reliable boom can often produce more sophisticated photographs than a studio filled with poorly controlled lights.
Learning to control shadows and reflections is more valuable than simply adding more illumination.
Part Seven: My Recommended Purchasing Order
If I were building a studio from scratch, I would divide the purchases into four stages.
Stage One: Build a Functional Studio
Purchase two strobes, a compatible wireless trigger, two quality light stands, sandbags, a medium softbox or octabox, a reflector, background support, and seamless paper.
Include the electrical supplies, clamps, and other items needed to work safely.
This equipment is enough to begin creating professional portraits, headshots, and many smaller product photographs.
Stage Two: Improve Lighting Control
Add a flash meter, a strip softbox with a grid, a C-stand with grip arm, black and white foamcore, and a collection of useful clamps.
At this stage, your ability to control the light improves dramatically.
You can create more interesting portraits, control background illumination, and develop lighting setups that are easier to repeat.
Stage Three: Expand Creative Possibilities
Purchase a properly rated boom and counterweight, beauty dish, larger reflectors, additional flags, V-flats, scrims, and specialized modifiers.
This equipment is especially useful for fashion, beauty, editorial portraits, and commercial photography.
Stage Four: Build a Professional Working Environment
Add rolling stands, permanent background systems, professional grip hardware, studio carts, improved storage, spare equipment, and specialty accessories.
A commercial studio might also benefit from ceiling-mounted lighting rails and pantographs.
At this point, the emphasis shifts toward making the studio safer, faster, more versatile, and more efficient for repeated client work.
Frequently Asked Questions About Photography Studio Equipment
How many strobes do I need for a photography studio?
Two strobes are an excellent starting point. One can serve as the main light while the second provides fill, rim lighting, or background illumination. Reflectors can often replace additional lights.
How powerful should my studio strobes be?
For many portrait studios, strobes in the 300–500 watt-second range are sufficient. Larger subjects, large groups, small apertures, and big modifiers may justify greater power. Equally important is the ability to reduce power sufficiently when working in a small space.
Are expensive softboxes worth the money?
Premium softboxes generally offer better materials, convenience, and durability. However, inexpensive modifiers of comparable size and design can produce very similar lighting. For photographers on a budget, a good strobe and stand are often higher priorities than an expensive softbox.
What background colors should I purchase first?
Start with white, gray, and black. These provide enormous flexibility for portraits, product photography, and creative lighting. Additional colors can be purchased as needed.
Do I really need a C-stand?
Not immediately. A conventional light stand is sufficient for many basic lighting setups. As you begin using flags, reflectors, and overhead accessories, a C-stand becomes one of the most useful additions to the studio.
Should I buy a handheld flash meter?
A flash meter is not mandatory, but it is valuable. It simplifies exposure measurement, helps establish consistent lighting ratios, and makes complex studio setups easier to reproduce.
Can budget lighting equipment produce professional results?
Absolutely. Expensive equipment may offer greater reliability, convenience, or specialized features, but excellent photographs depend on the quality and placement of the light, the photographer’s technique, and the ability to control the scene.
Is it better to buy more strobes or more modifiers?
Once you have two reliable strobes, I would generally invest in additional modifiers, flags, grip equipment, and reflectors before buying several more lights. These tools expand your ability to shape light and control reflections.
Final Thoughts: Build a Studio Around Control, Not Just Equipment
Building a photography studio is an investment, but it doesn’t have to happen overnight.
Begin with reliable lights, strong stands, versatile modifiers, and a simple background system. As your skills improve, add equipment that solves specific lighting problems.
Pay particular attention to grip equipment and lighting-control tools. Flags, reflectors, scrims, and bounce cards rarely receive the attention given to expensive strobes, yet they are often what make the biggest difference in sophisticated studio photography.
An inexpensive white reflector can improve a portrait. A black card can transform the appearance of a glass bottle. A carefully positioned flag can remove an unwanted reflection that would otherwise require substantial editing.
The goal isn’t to own the largest collection of studio lights.
The goal is to have complete control over the light you already have.
And once you understand how to shape, block, reflect, and position that light, even a modest studio can produce extraordinary photographs.