Epson inkjet • OHP film • Sized paper | John Whitehead
01 / Choose and size the paper
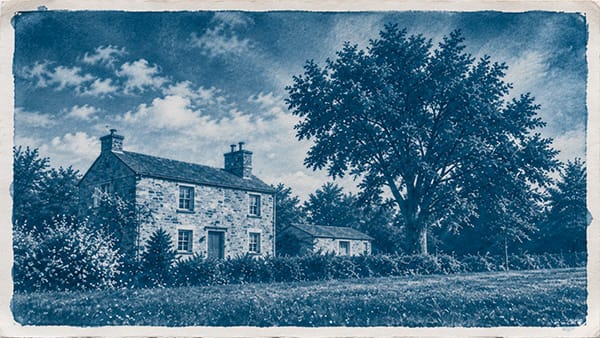
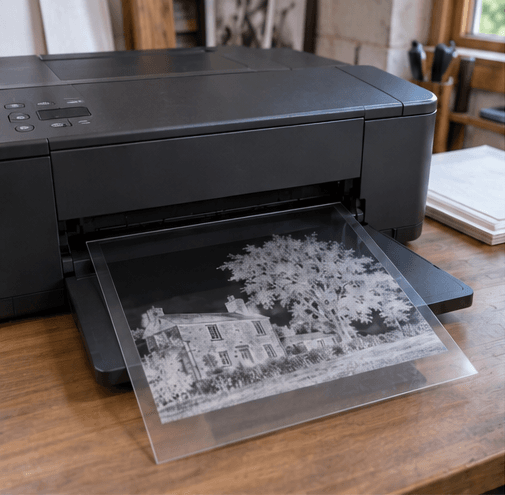
Cyanotype is a UV contact-printing process. You print a transparent negative with the Epson, then use it to expose hand-coated paper. The blue image forms chemically on the paper; the Epson does not print the final cyanotype. The negative must be the same size as the desired image.
Before you begin: skin contact and ingestion
Cyanotype sensitizer is a photographic chemical, not body paint. Avoid contact with stock solutions, mixed sensitizer, wet coatings, and wash water. Ferric ammonium citrate can irritate skin and eyes; swallowing it can irritate the mouth, throat, and stomach and cause vomiting or diarrhea. The risk depends on the product, concentration, and amount. Never taste or ingest cyanotype chemicals. [7]
Wear chemical-resistant gloves appropriate to your kit and splash goggles, cover cuts, and keep food and drinks out of the work area. Use dedicated utensils and clearly labeled containers, never beverage bottles. Keep chemicals away from children and pets, and wash your hands after removing gloves. Read your kit’s current safety data sheets (SDS). If exposure occurs, follow the first-aid guidance at the end of this guide.
1. Gather the materials
Use an Epson inkjet compatible with the chosen coated inkjet OHP film, image-editing software, traditional two-part cyanotype chemistry, cotton paper, a dedicated soft brush, measuring tools, nitrile gloves, eye protection, a contact frame or glass/board/clips, water trays, a timer, and sunlight or an enclosed UV exposure unit. Keep chemistry utensils separate from food equipment. Follow product safety and disposal directions; keep ferricyanide away from strong acids. Shield eyes and skin from UV lamps.
2. Choosing the Best Paper for Cyanotype Printing
Your paper affects more than the appearance of a cyanotype. It influences how evenly the sensitizer spreads, how much detail the print holds, and how well the sheet survives washing.
A useful starting point is a strong, unbuffered paper with a surface designed for hand-coated photographic processes. Cotton papers are excellent candidates, but fiber content alone does not guarantee success. Sizing, buffering, surface texture, and your coating technique all affect the final image.
For traditional cyanotypes, look for rich Prussian blue shadows, clean paper-white highlights, and smooth transitions between them.
Recommended Papers for Cyanotypes
Why Unbuffered Paper Matters
Buffering and sizing are different things.
An alkaline buffer, commonly calcium carbonate, is added to many art papers to help neutralize acids. However, cyanotype chemistry is sensitive to alkaline conditions. A paper that performs beautifully with watercolor or drawing materials may produce disappointing cyanotypes.
Also, acid-free does not mean unbuffered. Standard Stonehenge and Arches Aquarelle illustrate this distinction: both are described as acid-free, yet both contain alkaline buffering.
For a straightforward starting point, choose paper explicitly described as suitable for cyanotype and free of alkaline buffering. Jacquard also cautions that high-pH conditions can discolor cyanotype images. Jacquard’s cyanotype troubleshooting guide
What Is Sized Paper?
Sizing is a treatment that controls how readily paper absorbs liquid. It may be incorporated into the sheet during manufacturing, applied to its surface, or both.
For cyanotype printing, the goal is controlled, even absorption. The sensitizer should spread smoothly without immediately soaking through the sheet or collecting in beads.
Many papers already arrive sized. For example, Hahnemühle Platinum Rag has sizing intended for photographic coating, while Arches Aquarelle contains gelatin sizing. Buying sized paper does not automatically mean you need to apply another sizing layer.
Start by testing the paper as supplied. Additional sizing is a process adjustment, not a required step for every cyanotype.
If you want to explore extra sizing, compare two pieces from the same sheet: one untreated and one with your chosen sizing treatment. Use the same negative and processing conditions. Keep the extra step only if it improves coating, detail, or tonal separation.
Hot Press or Cold Press?
Paper texture changes both the look of the print and how easily you achieve close contact with a digital negative.
| Surface | Appearance | Useful for |
|---|---|---|
| Hot press / smooth | Less visible surface texture | Photographic detail, architecture, portraits, and subtle tonal transitions |
| Cold press | Noticeable but moderate texture | Landscapes, botanical images, and prints where paper texture is part of the design |
| Rough | Strong, pronounced texture | Experimental work and images that benefit from a visibly handmade surface |
For detailed photographic cyanotypes, a smooth surface is a sensible starting point. Textured paper can work, but the texture becomes part of the image.
Regardless of the surface, keep the negative flat against the dry sensitized paper. Jacquard identifies poor contact as a cause of blurry photographic cyanotypes. Cyanotype contact-printing guidance
Paper Weight and Wet Strength
Wet strength describes how well paper holds together when soaked. A cyanotype sheet must survive coating, washing, lifting, and drying without tearing or shedding surface fibers.
For a first project, paper around 300 gsm is a practical starting point. It has enough body to make wet handling manageable without becoming excessively heavy. Thinner papers can also work, but need more support when wet.
Weight alone does not guarantee compatibility. A heavy paper can still coat poorly or contain an unsuitable buffer. Some curling or buckling is also normal; it does not necessarily mean the paper has failed.
What About Less Expensive Papers?
If you already have Canson XL Watercolor, Canson Montval, or Strathmore 500 Series Bristol, try a small sample before purchasing more specifically for cyanotype.
Avoid assuming that every watercolor paper will produce the same results—or that a smooth Bristol surface guarantees good coating and washing performance. The exact product and finish matter.
A useful way to control costs is to cut a few sheets of a suitable photographic paper into small test pieces. This lets you learn exposure and coating on the same material you intend to use for finished prints.
Test Paper Before Making a Full-Size Print
Use this simple comparison whenever you change papers:
- Label the back in pencil. Record the brand, product, weight, surface, and any extra sizing.
- Coat a small area evenly. Watch for beading, rapid absorption, streaks, or fibers lifting under the brush.
- Let it dry completely. Keep drying conditions consistent between samples.
- Print a familiar negative or tonal test strip. Include highlights, midtones, and a dark area.
- Wash consistently. Note whether the sheet remains strong and whether the highlights clear.
- Compare the dry prints the following day. Judge blue density, highlight detail, evenness, texture, and surface damage.
Use the first comparison to identify promising papers, then refine exposure for each one. Different papers may need different exposure times or adjustments to the digital negative.
For your first photographic cyanotypes, choose a smooth paper made for alternative processes, test its existing sizing, and keep your materials consistent while you learn.
Sizing controls how readily paper absorbs liquid. Start with smooth, hot-pressed, factory-sized cotton paper that is proven for cyanotype; roughly 250–300 gsm is a useful handling weight. Prefer unbuffered paper. “Acid-free” alone does not guarantee suitability because alkaline buffering can interfere with the blue image. Smooth paper generally makes close negative contact easier. [1]
Factory sizing may already be sufficient. Coat a small sample before adding more. If sensitizer beads up, extra sizing can make that worse. If it sinks in immediately, spreads excessively, or looks weak, compare a lightly hand-sized sample. Sizing and alkaline buffering are different properties; sizing does not neutralize unsuitable paper.
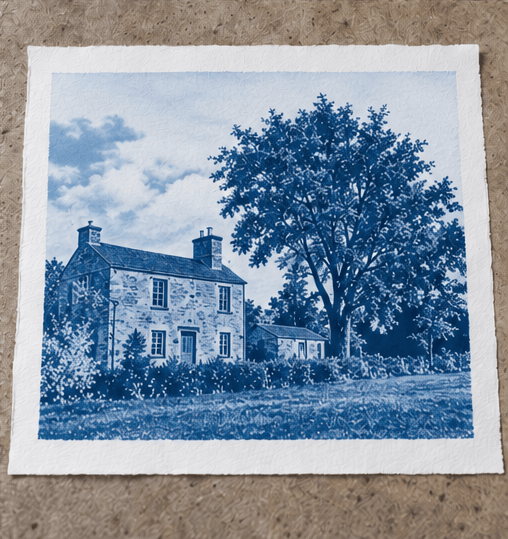
3. Optional: apply arrowroot sizing before sensitizing
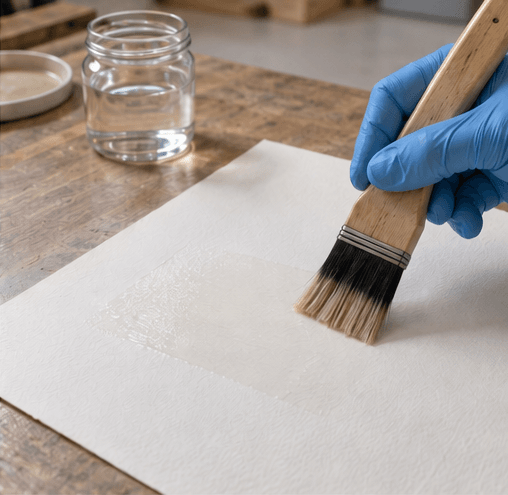
Photographers’ Formulary gives this preparation: mix 20 g arrowroot starch with about 20 mL hot water to make a lump-free paste; stir in 1 liter hot water. Use a pot larger than the liquid volume. Boil gently while stirring for 5 minutes, cool, and remove surface scum. Brush a thin, even coating horizontally and vertically; use a second clean brush to remove the glossy excess. Dry completely before applying cyanotype chemistry. [2]
Use fresh sizing within 24 hours. Test one coat rather than repeatedly building a thick surface. Compare sized and untreated scraps using the same coating and exposure. Additional sizing may improve surface holdout, but can also produce beading, streaks, or difficult clearing. [3]
02 / Build and print the OHP negative
4. Prepare the positive image
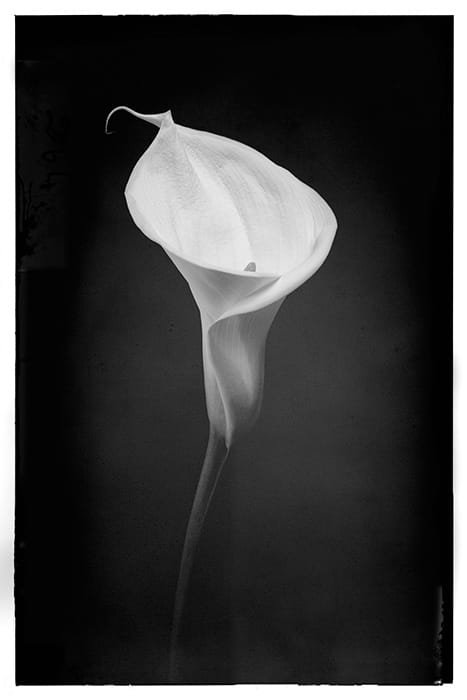
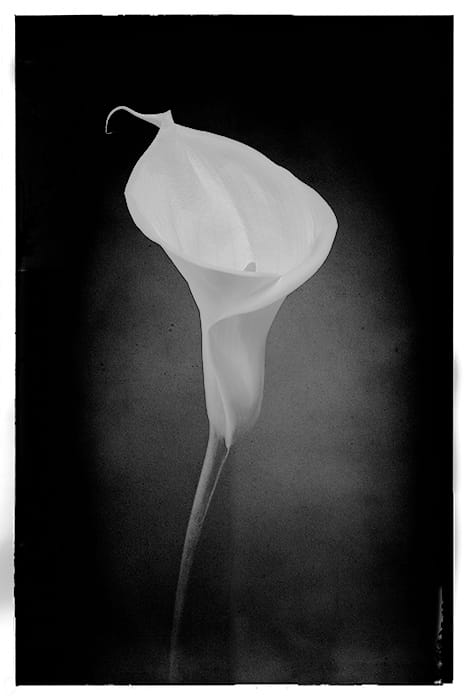
In Photoshop, duplicate your photograph and keep the original intact. Crop to the final print proportions and make a controlled black-and-white conversion. Retain highlight and shadow detail; avoid an exaggerated contrast preset. Set the image to its actual printing dimensions. For example, an 8 × 10-inch image at 300 ppi is 2400 × 3000 pixels; 300 ppi is file resolution, not the Epson’s droplet-resolution setting.
5. Apply a matched curve, invert, and mirror
If you have a cyanotype correction curve calibrated for this printer, ink, film, chemistry, and paper, apply it in the order its author specifies. Many workflows apply it to the positive, then invert. Bostick & Sullivan’s Epson curves are tied to particular inksets and Photo Black; they are starting points for compatible systems, not universal Epson profiles. [4]
For an initial test without a matched curve, use your edited black-and-white image, invert it once, and label it “uncalibrated.” Keep it in RGB mode unless your chosen workflow requires otherwise. Flip horizontally once so the final contact print reads correctly with the ink facing the paper. Add a small orientation word outside the image as a check; avoid mirroring again in the driver.
6. Use the coated side of inkjet OHP film
Use film explicitly made for inkjet printing and compatible with your inks—not ordinary clear acetate or laser-only transparency. Pictorico OHP is one purpose-made option. Identify the coated side using the manufacturer’s packaging/notch instructions; notch conventions are product-specific. Handle edges and load one sheet using the feed path approved for your printer and film. [5]
| Epson setting | Practical starting approach |
| Media type | Use the film supplier’s recommendation for the model. A glossy-photo setting is common in some workflows, but is not universal. |
| Quality / speed | Use high-quality photo output. Turn off high-speed/bidirectional printing if available for the initial test. |
| Scale / borderless | Print at 100% actual size. Turn borderless expansion and fit-to-page off. |
| Color handling | Use the settings required by the negative workflow. If the application manages color, disable driver color correction; do not apply both. |
| Ink density / B&W mode | Do not maximize ink blindly or switch to Advanced B&W unless the calibration calls for it. Watch for puddling and roller marks. |
7. Dry and inspect
Run a nozzle check first. Print a small test before a full sheet. Let ink cure for the film maker’s recommended interval; overnight is a useful conservative first trial. Inspect for banding, smears, and blocked detail. Visible darkness is not a reliable measurement of UV-blocking density—judge the contact print.
03 / Coat, dry, and assemble
8. Mix the sensitizer
Use the traditional two-part process described by your kit. Prepare its stock solutions as directed. In subdued indoor light away from windows and UV, measure equal volumes of the two stocks into a clean cup—for example, 2 mL + 2 mL. Bottle letters are not consistent across brands, so identify the actual solutions. Mix only what the session needs. This guide does not substitute for the different instructions used with “New Cyanotype” chemistry. [6]
9. Coat the sized surface evenly
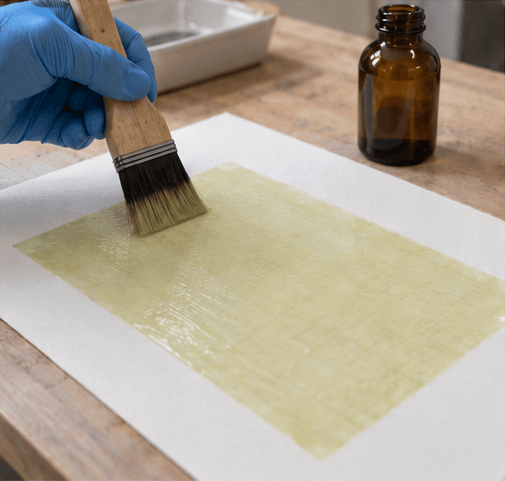
Mark the image corners lightly in pencil, outside the picture area. Use a dedicated soft brush to spread a thin, even yellow-green coat over the image area. Start with a modest measured volume; add only enough for coverage. Brush across and then lengthwise, stopping before the surface becomes sticky or fibers lift. Record the amount used so repeat prints have similar coatings.
Leave an uncoated margin for a white border. Coating beyond the negative will turn that exposed border blue unless it is masked with opaque material. Do not use a second coat as an automatic cure for weak prints; first check paper, exposure, and negative density.
10. Dry completely in the dark
Lay the sheet flat in a ventilated dark location until fully dry; about an hour is a starting allowance, with longer needed in humid conditions. A damp coating can adhere to the negative and damage both surfaces. Keep drying time and humidity similar from test to test. Store ready sheets protected from UV and moisture. [1]
11. Make a tight contact sandwich
| Layer, from the light downward | Orientation |
| Clean glass | Use ordinary clear glass; avoid UV-blocking conservation glazing. |
| OHP negative | Printed ink side DOWN, directly touching the sensitized surface. |
| Coated paper | Dry sensitized side UP, against the ink. |
| Backing board / frame | Rigid, flat support and even pressure across the image. |
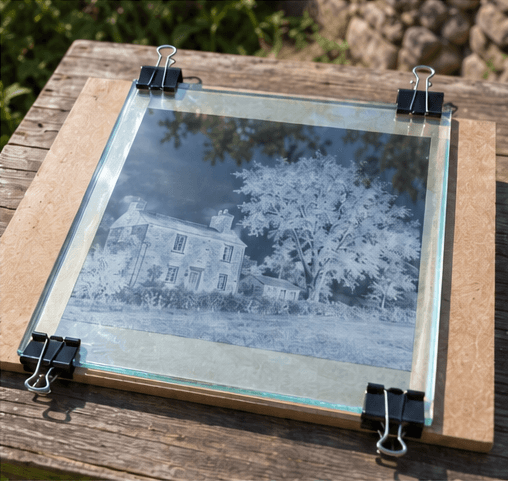
Clamp the edges outside the image, or close the contact frame. Check the small orientation word through the glass; it should read normally. Inspect for dust and wrinkles. Keep this same glass and film in place for all exposure calibration. Do not open an ordinary clip frame during exposure; shifting registration makes a double image.
What the negative does
Dense ink blocks UV and produces pale print values. Clear film passes more UV and produces darker blue values. Gray ink produces intermediate tones. The paper texture remains visible in the finished image; a rough surface can limit very fine detail even with a sharp digital file.
04 / Test the exposure, wash, and dry
12. Find a usable exposure range
Expose under steady sunlight or a fixed UV unit, using a timer. Sunlight varies with season, cloud, angle, and time of day. As an exploratory test, compare 2, 4, 8, and 16 minutes; these are test intervals, not recommended final exposures. Use identical image strips from the same printed negative. Process each identically. If all are pale, extend the range; if all are too dark, shorten it.
For more rigorous calibration, expose coated paper through a blank piece of the same OHP film beneath the same glass. Find the shortest exposure that gives the maximum stable blue after washing and full drying. Include an opaque-covered patch for paper white. This separates base exposure from the negative’s density and tonal curve.
13. Expose the full image
Use your selected test time and the same light distance, paper, coating, and glass. Carry the frame covered until exposure begins. The printing-out image can look dull, bronze, or partly reversed before washing; its appearance is not the final print. Remove the frame from UV, then separate the dry negative and store it flat. Only the paper goes into the wash.
14. Wash in clean, cool water
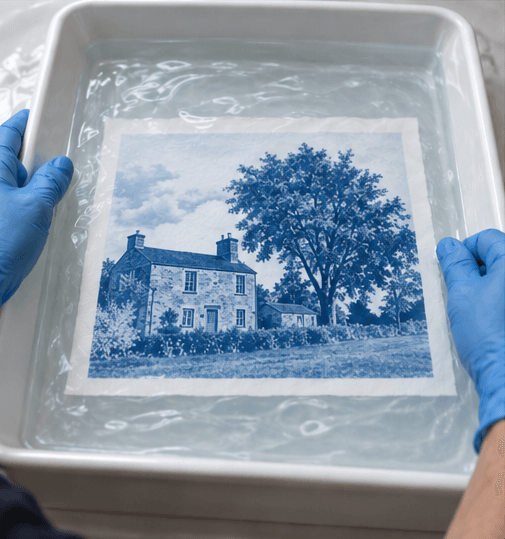
Submerge the paper evenly and agitate gently. Change the water as unused yellow sensitizer clears. For Jacquard’s traditional kit, wash at least 5 minutes and until the water clears; Bostick & Sullivan specifies 12–15 minutes with changes about every 2 minutes. Follow the instructions for the chemistry you actually use, and check that highlight staining has cleared. Use clean trays without soap residue. [1, 6]
Hard or alkaline water can affect the result; use distilled or deionized water for a comparison if prints bleach or clear poorly. Do not use Dektol, Selectol, a silver-print stop bath, or fixer. This workflow uses water processing and oxidation.
15. Let the blue develop fully
Drain gently and air-dry on a clean screen or hang from the margins, away from direct sun. Let the print oxidize for about 24 hours before final evaluation. A peroxide bath is optional and speeds the appearance of the final blue; it does not replace washing or rescue missing exposure. For the first tests, use natural air oxidation to keep the workflow simple. [6]
16. Refine the negative, then repeat
Print a grayscale step target through the same negative workflow. Once maximum blue and paper white are established, use the dried target to build or refine a correction curve for the midtones. Keep all printer settings fixed. Recalibrate after changing paper, sizing, ink, film, chemistry, or the exposure setup. Judge the photograph beside the target after both have fully dried.
05 / Solve problems and repeat the result
| Problem | Likely cause / next check |
| Ink beads or wipes off OHP | Wrong side, incompatible coating, too much ink, or insufficient drying. |
| Soft or doubled details | Loose contact, reversed ink orientation, textured paper, or movement in the frame. |
| Pale image / blue washes away | Too little exposure, unsuitable paper, excessive washing, or alkaline water. Compare a blank-film exposure control. |
| Highlights are blue | Negative does not block enough UV, too much exposure, or fogging. Check an opaque-covered control patch. |
| White highlights but muddy midtones | The tonal curve may need calibration; changing exposure alone may sacrifice either endpoint. |
| Yellow highlights remain | Incomplete clearing, excessive coating, or troublesome paper/sizing. Test thinner coating and clean water. |
| Patchy coating | Too much sizing, uneven brushing, contamination, or sensitizing before the size was dry. |
A practical first-print plan
Begin with a 5 × 7-inch image on a larger sheet of factory-sized, cyanotype-compatible paper. Make an uncalibrated negative and an exposure test. Compare a hand-sized scrap only if the coating needs improvement. Once a reliable exposure and coating are established, refine the negative curve and enlarge the image.
Record these settings
Printer model and inkset; film and coated side; media, quality, and color settings; curve version; image size; paper and sizing; coating quantity and drying interval; light source and distance; exposure; wash method; and appearance after 24 hours. Save the layered positive master, negative output file, and printer preset together.
Sources and further instructions
[1] Bostick & Sullivan — Traditional cyanotype kit instructions
[2] Photographers’ Formulary — Arrowroot sizing preparation (Liquid Cyanotype instructions)
[3] Jill Enfield — Sizing or subbing papers
[4] Bostick & Sullivan — Digital negatives and Epson-specific curves
[5] Innova / Pictorico — Ultra Premium OHP film
[6] Jacquard — Traditional cyanotype instructions
Use current kit labels and safety data sheets for handling and disposal. The older Formulary sheet is cited for its sizing recipe; its optional toners, additives, and historical disposal advice are outside this workflow.
Final safety reminder: prevent exposure and act promptly
Cyanotype chemistry must stay off your skin and out of your mouth. Clean the work area, store chemicals securely in labeled containers, and follow your kit’s disposal instructions. Do not use cyanotype chemistry on skin or on food-contact surfaces.
Skin contact: Remove contaminated clothing and rinse the skin immediately under room-temperature running water for at least 15 minutes. Use mild soap for material that sticks. Contact Poison Control for advice; obtain medical care if irritation persists or worsens.
If swallowed: Do not induce vomiting or try to neutralize the chemicals. Call U.S. Poison Control immediately at 1-800-222-1222; do not wait for symptoms. Have the product label or SDS, estimated amount, and exposure time available. Never give anything by mouth to someone unconscious or unable to swallow.
Eye contact: Rinse with room-temperature water for 15–20 minutes, removing contact lenses if possible, then contact Poison Control.
Emergency: If someone collapses, has a seizure, has trouble breathing, or cannot be awakened, call 911. Outside the U.S., contact your local poison center or emergency service. [8]
[7] Ferric ammonium citrate safety data sheet — supplier-hosted reference; consult your own kit’s current SDS.