Holga and Diana Cameras: A Beginner’s Guide to Creative Film Photography
The beauty of imperfect film
Why photograph with a plastic camera?
By John Whitehead | Shutter Bug Academy
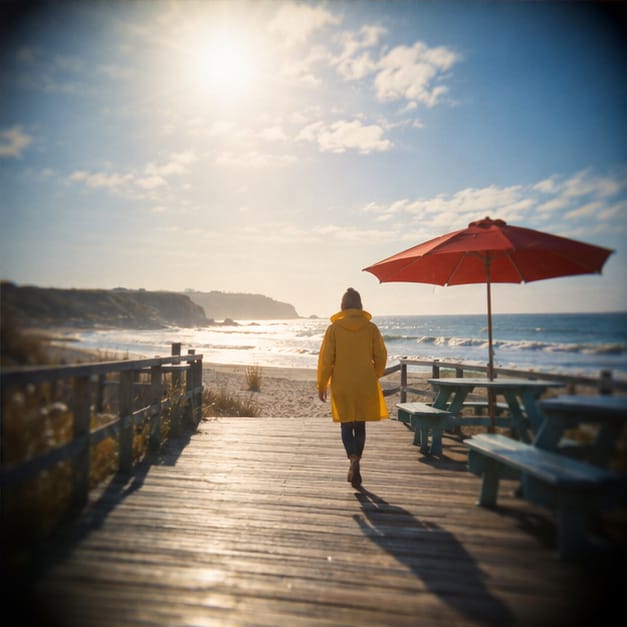
Holga and Diana cameras invite you to make photographs that feel a little like memories. Edges soften, corners darken, light leaks, and an ordinary scene can become mysterious. Their appeal comes from the interaction of a simple lens, film, light, and the choices you make.
These are real film cameras, often called toy cameras because of their inexpensive construction. The name describes the hardware, not the seriousness of the photographs. You still choose the subject, light, timing, and composition. A strong picture needs more than a light leak.
All plastic cameras have their own idiosyncrasies, so even two cameras of the same model can produce noticeably different results. A friend of mine labels each of his cameras so he knows the unique characteristics of every one. When he chooses a particular Diana camera, he already knows the light leaks, softness, vignetting, and other effects it is likely to produce, giving him more control over the final image.
What were the Holga and Diana cameras?
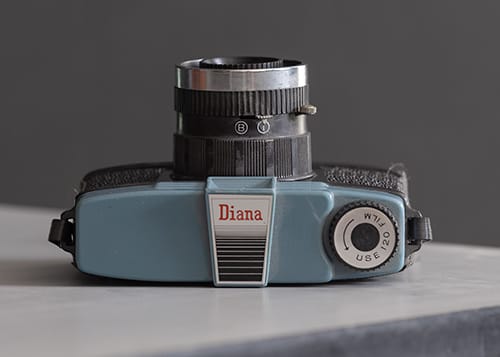
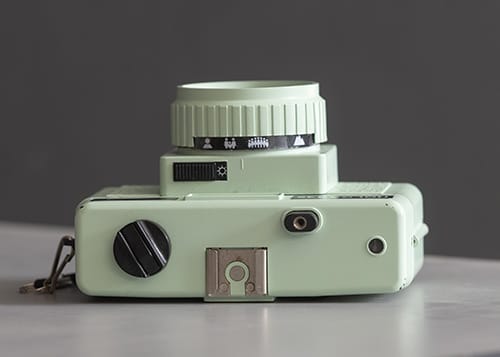
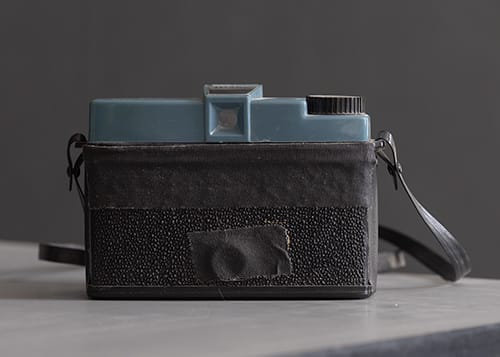
The original Diana appeared in the 1960s, made by the Great Wall Plastic Factory in Hong Kong. Sold as an inexpensive novelty camera under several names, it used 120 roll film and a simple plastic lens. Photographers later embraced its soft rendering and inconsistent results as expressive tools. [1]
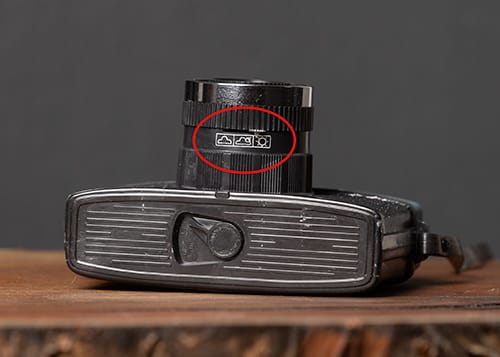
The Holga arrived in 1982 as an inexpensive camera intended for everyday photography. Its simple construction and distinctive images eventually earned it a following among artists and experimental photographers. The familiar Holga 120N continues that approach: a lightweight body, a basic lens, distance symbols, and few exposure controls.
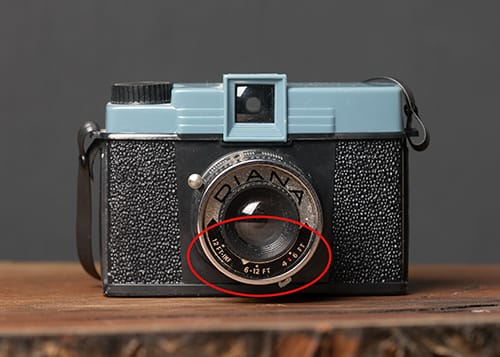
Neither camera is an SLR. The viewfinder does not show the image through the taking lens, and it cannot confirm focus. You estimate the subject distance and set the lens accordingly. Leave some room around important details when working close to a subject.
Did Lomography replace them?
Not exactly. Lomography is a company and international analogue-photography community, not a single replacement camera. The Lomographic Society International began in 1992 around enthusiasm for the LOMO LC-A. Lomography later helped bring plastic-camera photography to a new audience.
In 2007, Lomography revived the Diana design with the Diana+ family. The modern Diana F+ carries that idea forward with 120 film, multiple exposures, bulb mode, and creative accessories. Holga cameras also remain available through specialist film retailers. You can still begin with these camera families today.
For an alternative using 35mm film, the Lomography Lomourette makes half-frame pictures: roughly 72 exposures on a 36-exposure roll. Its smaller negatives and rectangular frames give a different experience from a square 120 negative. More exposures can reduce film cost per picture, but ask your lab about half-frame scanning fees.
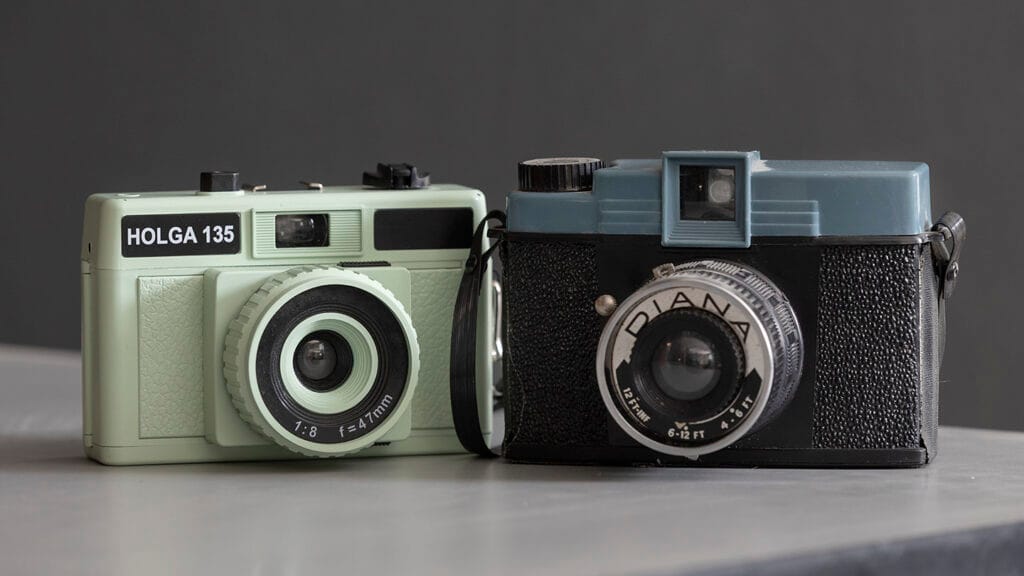
Holga vs. Diana: which should you choose?
Choose a plastic-lens Holga 120N if you want a straightforward introduction to the classic square-frame approach. Choose a Diana F+ if its pinhole option, interchangeable-lens system, and other accessories appeal to you. Begin with the standard lens before buying extras. A vintage Diana makes more sense when the original object itself is part of the attraction.
Check the exact model before ordering. A Holga 120N, a glass-lens Holga, a 35mm Holga, and a pinhole Holga are different tools. Likewise, a Diana F+, Diana Mini, and Diana Baby do not all use the same film. The word Diana alone does not tell you what to buy.
Where to find a Holga or Diana camera
For a new camera, start with Lomography’s Diana range or a specialist Holga retailer such as Freestyle Photographic Supplies. Both had relevant product listings when this guide was checked on September 24, 2026. Follow the source links below for current availability; stock, bundles, and prices change.
For used examples, search local camera stores, camera fairs, estate sales, and marketplaces such as eBay. Search by exact model and request photographs of the lens, interior, back, and controls. A seller saying the shutter clicks is not the same as a film-tested camera.
Ask whether the back closes securely, the shutter opens and closes, the focus ring turns, and the winding mechanism works. Confirm that the take-up spool and correct frame masks are included. Inspect cracks, damaged clips, lens haze, and deteriorating foam. Look for a return policy or recent test negatives.
Budget for the complete first roll: camera, film, processing, scanning, and shipping if needed. A cheap body can still be expensive to learn on. Before buying 120 film, confirm that your chosen lab develops and scans it.
What creates the Holga and Diana look?
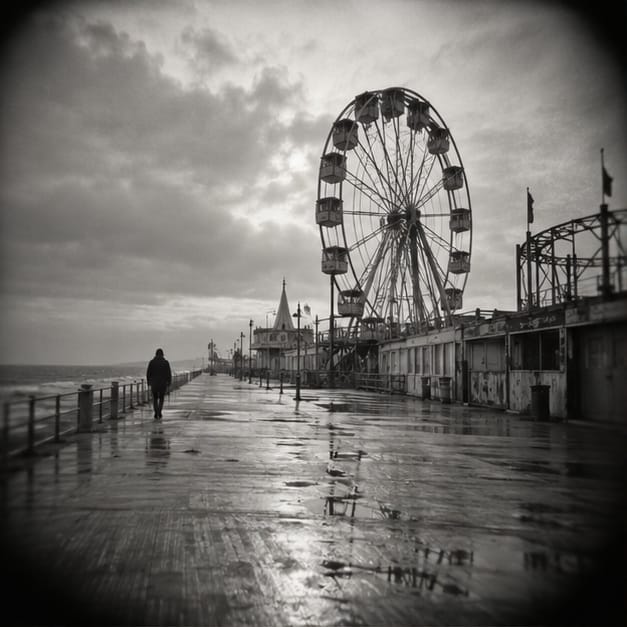
Soft edges and uneven sharpness. A simple lens may render the middle of the frame more clearly than its edges. This is different from a missed focus setting or camera shake, although those can occur too. Put an important face or detail near the center when you want it to remain legible.
Vignetting. Darkening toward the corners can pull attention inward and make the frame feel enclosed. Its strength varies with the lens, camera, and image format. It is not guaranteed to look identical on every roll.
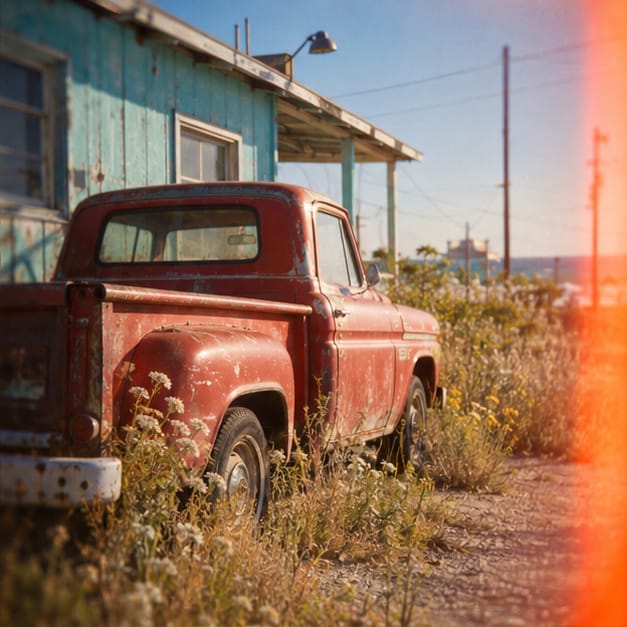
Light leaks. Stray light entering the camera or reaching a loosely wound roll can create streaks, fogging, or patches. Color negative film may show warm red or orange areas; black-and-white film shows tonal changes. A leak can also erase a photograph. You do not need one to get the plastic-lens look.
Flare and color. Strong light near the lens can wash out contrast or soften highlights. Color also depends on film stock, exposure, processing, and scanning. A Holga does not automatically make every frame oversaturated, and a Diana does not always make pastel pictures.
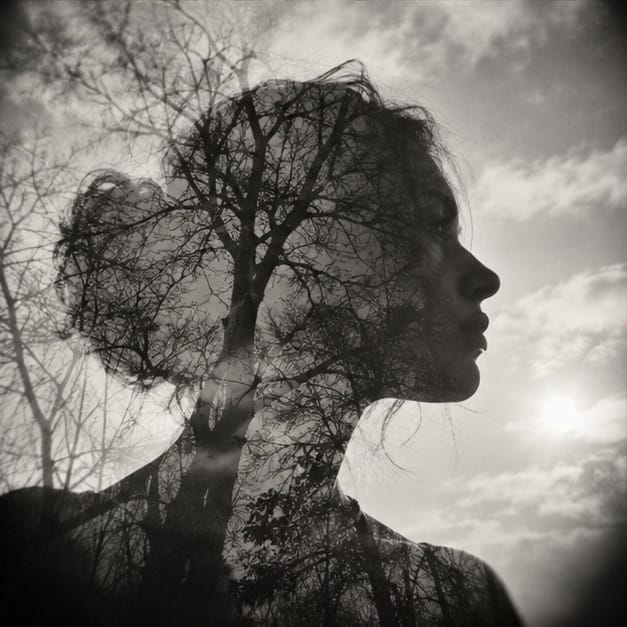
Multiple exposures. On models with an uncoupled shutter and advance, firing again before winding exposes the same frame twice. The exposures add light; they do not behave like two opaque pictures pasted together. Two equal exposures each need about one stop less light for a combined normal exposure, when the controls allow it. Limited controls make testing essential.
Overlapping frames. Advancing only partway can place one frame over the edge of another. This is different from a double exposure made without advancing at all. Ask your lab for an uncut roll and an appropriate scan if you intentionally make a continuous sequence.
How to shoot your first roll
1. Start with the right film. Standard Holga 120N and Diana F+ cameras use 120 roll film. The number 120 is a format designation, not a width of 120 mm. Choose fresh negative film and one familiar lighting situation. ISO 400 is a practical starting point in many daylight conditions; check the manual and light rather than treating it as a universal setting.
2. Choose the frame format before loading. On the Holga 120N, match the mask and rear counter setting: 12 frames for 6 x 6 cm, or 16 for 6 x 4.5 cm. Diana F+ masks instead offer 12 large squares or 16 smaller squares. Do not assume their 16-frame modes are identical. Note: I will be adding a video on how to load 120 film.
3. Load in subdued light. Feed the paper leader into the empty take-up spool and wind it snugly according to your model’s manual. Close the back before advancing to frame one. Keep the roll tight and protect it from direct sunlight. Never open the back to check a partly exposed roll. [8]
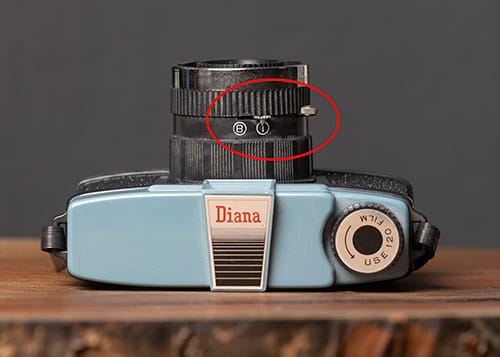
4. Check focus and shutter mode. Estimate distance, turn the focus ring, and select N for ordinary handheld photographs. B means bulb: the shutter stays open while the release is held. Use a tripod or firm support for deliberate long exposures. A cloudy symbol changes an aperture; it does not provide automatic exposure. [8]
5. Work in useful light. Begin outdoors with a still subject and clear shapes. These cameras have limited exposure control, so a dim room may need flash or a supported long exposure. A meter can show whether the available settings suit the light, even when the camera cannot make the indicated adjustment.
6. Expose, then advance. For ordinary pictures, establish a consistent shoot-then-wind routine. Write down the light, focus setting, aperture symbol, and frame number. Keep double exposures for a few planned frames so you can distinguish an experiment from a winding mistake.
7. Finish and process. After the last frame, wind all the remaining backing paper onto the take-up spool. Remove it in subdued light, keep it tight, and seal its paper band. Unlike 35mm film, a standard 120 roll is not rewound into its original spool. Choose processing for the actual film: C-41 for conventional color negative film, or the appropriate black-and-white process. [8]
8. Evaluate the negatives and scans. Ask for your negatives back. Thin negatives may suggest underexposure, while a scan alone can conceal it through automatic corrections. Look for repeated leaks or spacing problems. Keep the optical character you like and fix mechanical problems that are spoiling the pictures. If your camera leaks too much light you can place gaffers tape on the affected edges.
Three ideas for a more intentional first project
One place, twelve pictures. Photograph a familiar street or park. Build the series around repeated shapes, silhouettes, or a single color. Let the subject carry the sequence instead of relying on a different effect in every frame.
Center and edge. Photograph the same subject twice from the same distance, placing it near the center and then near an edge. Compare detail and corner darkening. This gives you a useful map of your particular lens.
A portrait in two layers. Make a dark silhouette against a bright background, then expose texture such as branches onto the same frame. Texture tends to remain most visible in areas that received less light in the first exposure. Test exposure combinations and keep notes.
A different way to see
Holga and Diana cameras reward curiosity, but their simplicity still asks for attention. Learn how your camera responds, choose light that it can handle, and build photographs around meaningful subjects. The pleasure is not merely making an imperfect image. It is discovering how a modest camera can change what you notice.