Easily Tackle Selective Layer Adjustments in Adobe Photoshop
Selective Layers Adjustments in Adobe Photoshop
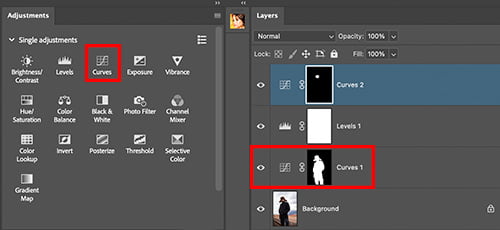
Selective layer adjustments involve creating non-destructive edits. These adjustments are applied as a separate layer in Photoshop, rather than directly altering the image. You can view these adjustments in the image preview or disable them by clicking the eye icon on the layer. If you save the image as a .tif or .psd file, the layers will be preserved. However, if you save it as a .jpg, the layers will be flattened and removed. Next, we make a layer adjustment using one of three methods. Photoshop creates a layer mask based on the selection, allowing you to make the corresponding adjustment. This process is demonstrated in the images below

This image above was a subject selection in Adobe Photoshop.

This image took the selection from the left, and when the curves adjustment is clicked, a layer adjustment with a mask is automatically created.
Additionally, this video covers how to use the Quick Selection Tool, which I skipped in the last video. We’ll also explore the Contextual Task Bar and the Luminosity Blending Mode. Blending modes can be complex, so we’ll dive deeper into them later in the series. The Contextual Task Bar is a new feature, and I’ll provide more information on it as needed.


