Create Depth of Field with Lens Blur and other ACR Features
Part 4 of 4

What is in this Video Tutorial?
Create Depth of Field with Lens Blur and other ACR Features. I initially thought this would be a three-part series, but Adobe Camera Raw (ACR) is packed with so many features that it turned into more. In part 4, we explore the Effects, Curves, Color Mixer, Color Grading, Detail, Optics, Lens Blur, Calibration, Geometry, cloning tools, red-eye correction, snapshots, presets, and how to apply previous adjustments, including copying and pasting settings.
Overview of the Features in this Video
Detail: This section covers sharpening and noise reduction. It’s crucial to remember that you should never sharpen an image until it’s sized for its final output—something I explain further in the tutorial. I prefer the new DeNoise tool over traditional noise reduction, although the latter is still a solid option for .jpg files.
Effects: This includes texture, clarity, dehaze, and vignette. While I’m not a fan of using texture, clarity, or dehaze in ACR, I do make use of vignette—but I prefer to apply it as an action in Photoshop.
Curves: ACR offers both parametric and point curves, similar to Photoshop. Personally, I don’t use curves in ACR because I prefer the sliders, but curves are my go-to adjustment in Photoshop, where you’ll find extensive tutorials on them.
Color Mixer: This tool allows you to adjust hue, saturation, and luminance for individual colors. However, since it’s a global adjustment, I usually prefer to handle Hue/Saturation adjustments in Photoshop.
Color Grading: Although color grading in ACR can produce cool effects, I generally reserve it for after I’ve made all other adjustments in Photoshop. I often use gradient maps in Photoshop for this purpose.
Optics: The Optics panel is primarily concerned with correcting lens-related issues that can affect the quality of your images. The main features include:
- Lens Corrections: Automatically or manually corrects distortion, vignetting, and chromatic aberration caused by the camera lens.
- Remove Chromatic Aberration: Eliminates color fringing that appears along the edges of objects, often caused by the lens not focusing all colors at the same point.
- Vignette Control: Corrects the darkening of image corners due to the lens (vignetting).
Geometry: The Geometry panel deals with the perspective and alignment of the image. It allows you to:
- Upright Adjustments: Correct perspective distortions, such as tilting buildings or misaligned horizons.
- Transform Tools: Manually adjust vertical and horizontal lines, as well as scale, rotate, and skew the image to achieve precise alignment.
Lens Blur: The Lens Blur feature simulates the out-of-focus blur, or bokeh, that occurs in the background (or foreground) when using a wide aperture. In Adobe Camera Raw:
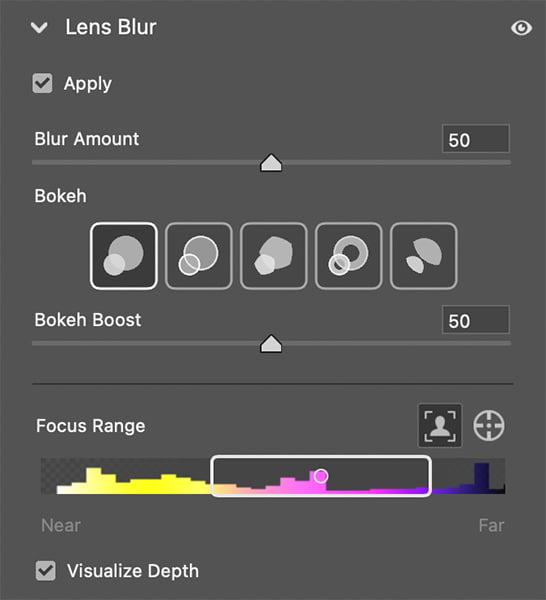
Depth Blur: Allows you to apply selective blur to certain areas of the image, mimicking the effect of a shallow depth of field.
- Bokeh Simulation: Creates realistic blur effects to enhance the aesthetic quality of the image, particularly in portrait or macro photography.
Calibration: The Calibration panel is used for fine-tuning the overall color rendering of your image. It includes:
- Primary Color Adjustments: Adjusts the hue, saturation, and shadows of the Red, Green, and Blue primary channels. This helps in achieving a specific color grading or correcting color issues caused by the camera sensor.
- Profile Selection: Allows you to choose different camera profiles, which can affect the overall look of the image, based on the way the camera sensor interprets colors.