The Zone System Made Practical: Better Black-and-White Film from Exposure to Print
John Whitehead | Shutter Bug Academy | Learn Film Photography
A beautiful black-and-white photograph is built from relationships: dark bark against luminous mist, weathered wood beside sunlit stone, or a white shirt emerging from deep shade. The Zone System gives those relationships a language. More importantly, it helps you decide how to expose and develop a negative so the final photograph looks the way you imagined.
You do not need to turn every photograph into a laboratory experiment. Start with two decisions: Which dark area needs texture? How bright should the important highlights look? Once you can answer those questions, exposure becomes a deliberate choice rather than a guess.
This guide uses ILFORD HP5 PLUS, a current ISO 400 black-and-white negative film, with ILFORD ID-11 diluted 1+1. The illustrated examples and meter readings are teaching simulations, not photographs exposed on HP5 PLUS or measured film tests. Their purpose is to show what to look for; your own negatives establish the precise exposure index and development times for your equipment.
Free .PDF Zone System Guide
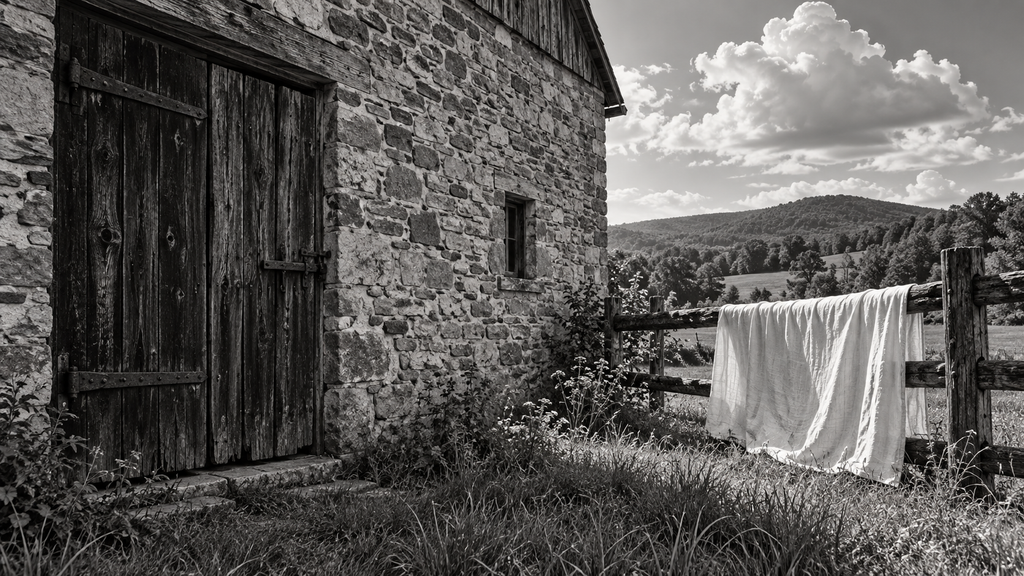
Visualize the result before exposing: dark wood with texture, a substantial middle-gray wall, and luminous linen with visible folds. These are intended print relationships, not measured zone values of image pixels.
1. What is the Zone System?
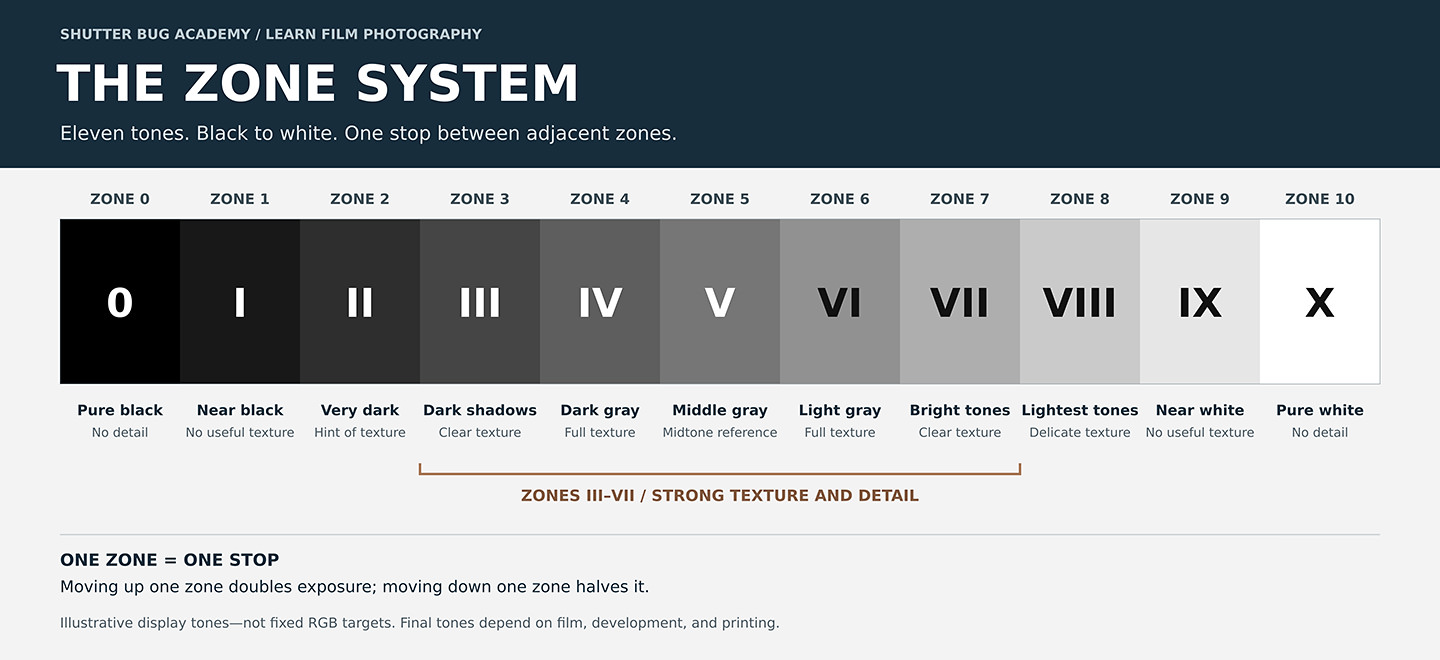
Developed by Ansel Adams and Fred Archer, the Zone System connects visualization, metering, negative exposure, development, and the final print. It describes eleven reference zones, numbered 0 through X. At the exposure stage, adjacent zones are separated by one stop. One stop more exposure doubles the light reaching the film; one stop less halves it.
Zone V is the middle-tone reference. A reflected-light meter recommends an exposure that would render the area it measures approximately as a middle tone in a calibrated normal workflow. The meter does not know whether you pointed it at black wood, gray stone, or white cloth. You decide where that subject belongs.
The zones are not eleven equally spaced RGB numbers, eleven fixed subject colors, or a claim that film can capture only eleven stops. They are a working language for relating subject luminance, exposure, negative density, and the tones you want in the finished photograph. Printing and scanning change the final mapping.
Illustrative Example of the Zone System
| Zone | Intended appearance in the final print | Practical example |
|---|---|---|
| 0 | Maximum black; no detail | A deliberately empty black recess |
| I | Almost black; slight tonal separation, no useful texture | The faintest suggestion of a shape |
| II | Very dark; first suggestion of texture | Deep foliage that needs little information |
| III | Dark with useful texture | Dark bark or shadowed wooden boards |
| IV | Dark middle tone; clear detail | Shaded stone or darker grass |
| V | Middle tone | A middle-gray reference |
| VI | Light middle tone | Light stone or softly lit pale fabric |
| VII | Bright with strong texture | White linen with clear folds |
| VIII | Very bright; delicate remaining detail | Luminous snow or a pale cloud |
| IX | Near white; minimal tonal suggestion | A highlight with almost no texture |
| X | Paper white; no detail | A brilliant reflection allowed to disappear |
Objects do not have permanent zone assignments. White cloth in shade can be darker than gray stone in sunlight. Skin tones also vary; do not assign every face to the same zone. Use the table to describe your intended photograph, not to label the world automatically.
2. Why use HP5 PLUS?
ILFORD currently lists HP5 PLUS in 35mm, 120, and sheet film. Its ISO 400 speed, medium contrast, and wide exposure latitude make it a useful teaching film. My reason for choosing it here is practical: you can learn shadow placement with an ordinary 35mm camera, then carry the same method into medium or large format.
The Zone System is not exclusive to HP5 PLUS. Other conventional black-and-white negative films also respond to exposure and development control. The important thing is to keep one film, one developer, one dilution, and one processing routine while learning. Changing all four at once makes your results difficult to interpret.
Start at EI 400. EI means exposure index: the speed setting you choose on the meter. It is not a new ISO rating for the emulsion. If tests show that your complete workflow needs more exposure to preserve shadows, test EI 320 or EI 200. Those settings give approximately one-third stop or one stop more exposure, respectively, than EI 400. Do not automatically rate HP5 PLUS at 200 simply because someone else does.
3. The two controls: exposure and development
Exposure establishes the information available in the shadows. A shadow that receives too little light produces very little negative density above the film base and fog. Increasing print exposure, moving a scan slider, or developing longer cannot reliably recreate texture that was never recorded.
Development controls contrast, especially the density of the more heavily exposed highlights. Within useful working limits, additional development increases the separation between low and high negative values. Reduced development restrains the high values. Shadows can also change, so exposure and development are not perfectly independent controls.
Remember that a negative reverses the scene. Dark subject areas produce relatively clear areas of film. Bright subject areas produce denser areas. A bright white wall therefore needs enough density separation to describe its texture, but not so much density that printing or scanning becomes unnecessarily difficult.
Dense highlights are not automatically destroyed. They may contain substantial information that needs a different printing grade, burning, or a better scan. The aim is a negative that fits your intended output comfortably, not a negative that looks attractive on a light box.
4. Meter a shadow and place it on Zone III
Use a reflected-light spot meter, either handheld or in-camera. A narrow spot helps isolate a small subject area. A broad center-weighted or evaluative reading mixes tones and is harder to use for precise placement. An incident meter is excellent for measuring illumination, but it does not directly measure the individual reflected tones used in this exercise.
Find the darkest important textured area, not simply the darkest thing in the picture. A narrow crack can be black. The wood grain on the door may need to survive.
Here is the complete worked example, using a fixed shutter speed:
- Set the meter to EI 400.
- Aim at the shaded wooden boards, avoiding the black gap and bright adjacent stone.
- Suppose the meter recommends 1/125 second at f/4.
- That recommendation places the measured boards approximately on Zone V.
- To place them on Zone III, give two stops less exposure than that spot reading: close from f/4 to f/5.6 to f/8.
- Set the camera to 1/125 second at f/8, then recompose without letting the camera replace that exposure.
Why reduce exposure when you are “exposing for the shadows”? Because the shadow meter reading would make the dark subject middle gray. Two stops less lets it remain dark while retaining texture, provided your film speed and processing are calibrated.
This is not an instruction to underexpose a whole-scene meter reading by two stops. The reference is specifically the reading from your chosen shadow. The same final exposure could be more generous than an evaluative reading dominated by a bright sky.
| Using the same shadow reading | Camera setting | Intended placement |
|---|---|---|
| Give four stops less | 1/125 at f/16 | Zone I: little useful shadow information |
| Give two stops less | 1/125 at f/8 | Zone III: dark texture |
| Use the spot reading unchanged | 1/125 at f/4 | Zone V: wood rendered as a middle tone |
The whole negative receives each exposure change. You cannot move just the door with the camera controls. All other subject values move with it.
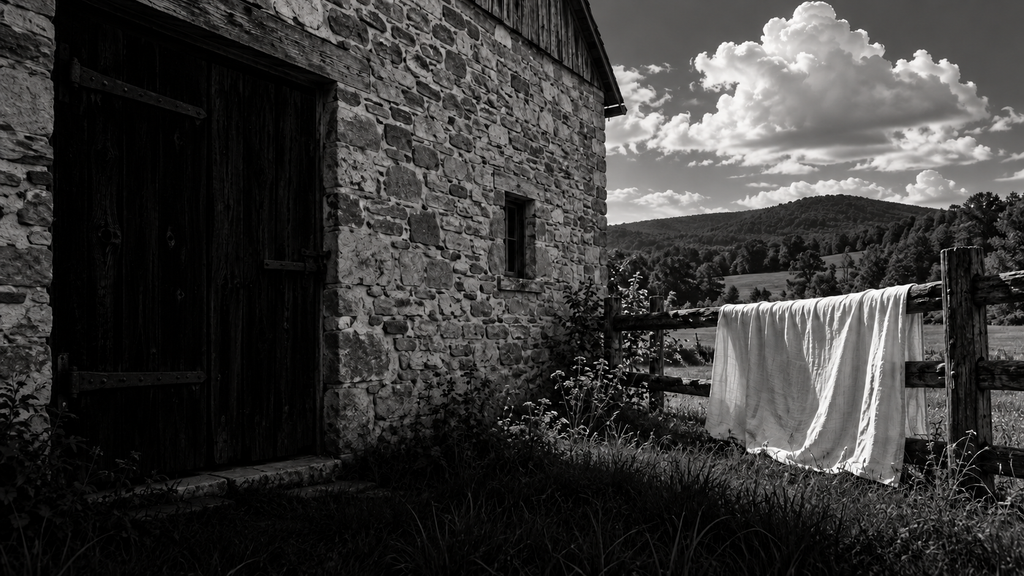
Compare with the opening illustration: the shadow boards lose separation. This simulates the consequence of inadequate shadow exposure; it is not a calibrated two-stop film test or a guarantee of how every scan would look.
5. Check where the highlights fall
Keep EI and shutter speed unchanged. Now meter the brightest area in which you want meaningful detail, such as the white linen. Do not use a tiny sun reflection if you intend it to print white.
Suppose the linen reads 1/125 at f/16. The original shadow reading was 1/125 at f/4. Count four stops: f/4 → f/5.6 → f/8 → f/11 → f/16. With the shadow placed on Zone III, a subject four stops brighter falls on Zone VII under the normal placement model.
The camera stays at 1/125 at f/8. Changing to f/16 after metering the linen would replace your shadow-based exposure and undo the placement.
Working relationship: predicted highlight zone = chosen shadow zone + measured stop difference.
This is an exposure-placement prediction. The negative curve, flare, development, paper, and scanning workflow determine the actual final tones. For this introductory exercise, use Zone VII for a bright subject needing strong texture. Zone VIII is also useful when a highlight should be more luminous with subtler detail; neither is a mandatory ceiling.
6. Choose normal, reduced, or increased development
The letter N means normal development for your tested output. N−1 means development calibrated to contract the chosen high value by about one zone compared with N, while maintaining useful low values. N+1 means a corresponding expansion. These labels do not mean subtracting or adding one minute, or cutting or doubling the time.
For the following examples, the intended print endpoint is Zone VII and the shadow placement is Zone III:
| Measured important range | Highlight prediction with N | Intended action |
|---|---|---|
| 3 stops | Zone VI | Consider N+1 if you want the high value at VII |
| 4 stops | Zone VII | Use N |
| 5 stops | Zone VIII | Consider N−1 if you want the high value at VII |
| 6 stops | Zone IX | Investigate stronger contraction; do not guess an N−2 time |
The target matters. A five-stop scene does not automatically need N−1. If Zone VIII is exactly the luminous highlight you want, normal development may be appropriate. The table expresses one chosen rendering, not a universal rule for scene contrast.
High contrast: preserve the plaster
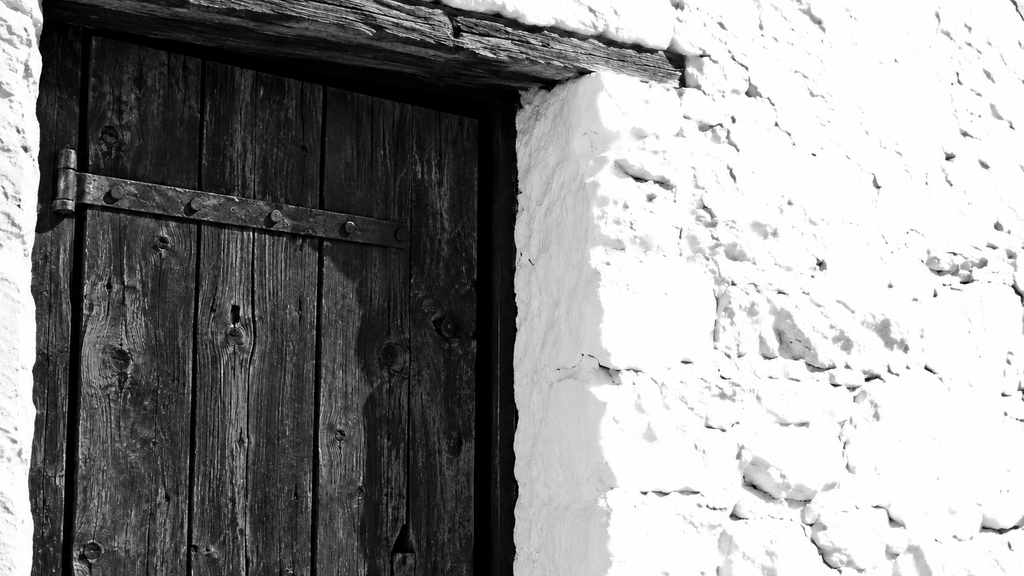
Before contrast control: the plaster looks harsh and much of its subtle relief is difficult to see. This simulates a straight print made from a negative with excessive highlight density for the chosen printing conditions, not proof that the film has lost all that information.
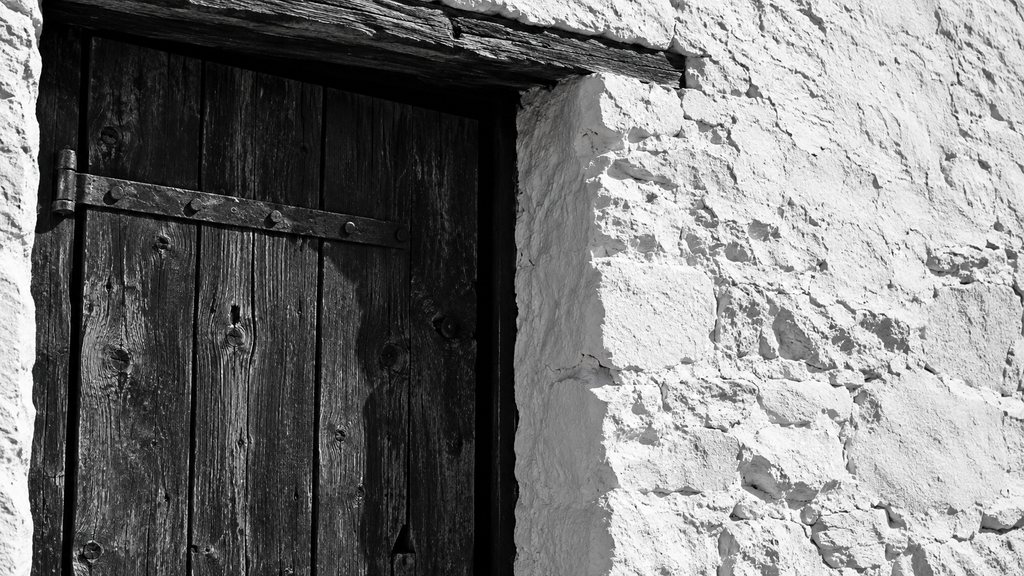
Teaching target: textured dark wood and bright plaster that retains surface detail. Imagine readings five stops apart; the values are assigned for the exercise, not measured from this illustration.
Suppose the door reads 1/125 at f/4 and the plaster reads 1/125 at f/22: five stops apart. Expose at 1/125 at f/8 to place the door on III. The plaster predicts VIII with N. If you want it closer to VII, use your tested N−1 development. Do not reduce camera exposure merely to make the plaster easier to print; that would move your important shadow downward too.
Low contrast: decide whether softness is the point
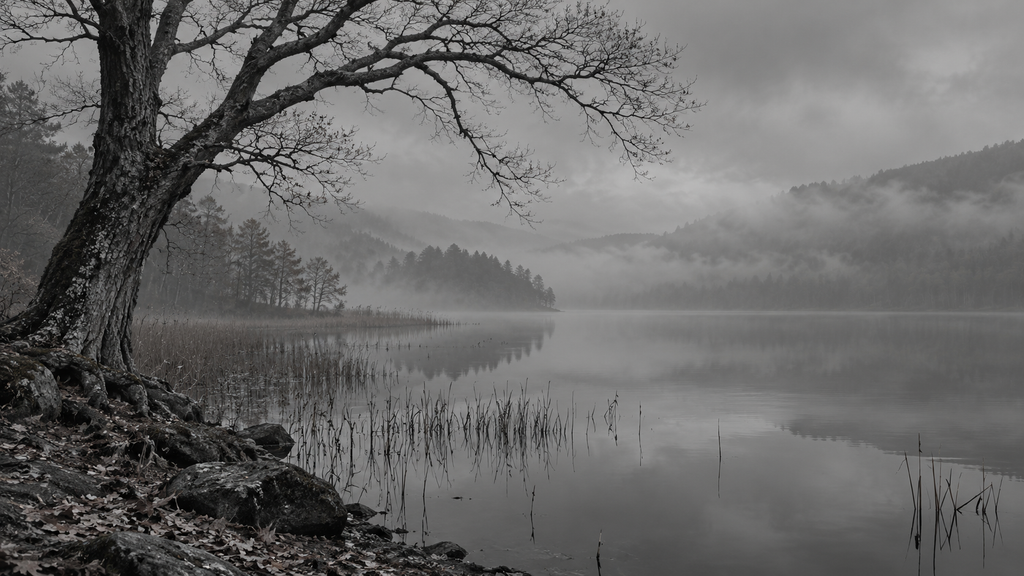
A naturally narrow tonal range can be beautiful. Expansion is a creative option, not an obligation to make every image black-to-white.
Imagine bark reading 1/125 at f/4 and the brightest important mist reading 1/125 at f/11: three stops apart. At 1/125 at f/8, the bark is placed on III and the mist predicts VI. Tested N+1 development could move the high value toward VII and increase separation. Normal development may better preserve the quiet atmosphere. Alternatively, print on a harder grade or adjust a scan after normal development.
7. A repeatable development starting point
For HP5 PLUS 35mm or 120 at EI 400, ILFORD lists ID-11 1+1, 13 minutes at 20°C/68°F for intermittent-agitation tank processing. [2] Treat this as the starting baseline, not proof that 13 minutes is your personal N.
Prepare ID-11 stock from the complete packet according to its instructions. Make the 1+1 working solution from equal volumes of stock and water immediately before use; use diluted developer once. [3] For example, 300 mL stock plus 300 mL water makes 600 mL working solution. Check both the tank’s fill requirement and the developer’s film capacity.
Use ILFORD’s HP5 PLUS agitation pattern: four inversions in the first 10 seconds, then four inversions in the first 10 seconds of each subsequent minute. The film sheet advises against a pre-rinse. [2] Keep temperature, agitation, filling, and draining consistent. Do not silently substitute a rotary or continuous-agitation routine for this intermittent one.
The remaining processing steps are normal: stop development, fix completely, wash, use wetting agent as directed, and hang to dry. Follow the current instructions for the specific stop bath and fixer you use. Development contraction is not permission to shorten fixing or washing. Load panchromatic film in complete darkness, not under a print safelight.
How much should you adjust the time?
There is no universal HP5 PLUS percentage that guarantees N−1 or N+1 in every workflow. For a controlled first experiment, try 20% shorter and 20% longer than your established N, holding everything else constant. These are trial brackets chosen for this guide, not manufacturer-certified zone conversions.
If your baseline is 13:00, the arithmetic is:
| Trial | Calculation | Time at 20°C/68°F | What to evaluate |
|---|---|---|---|
| Reduced-development trial | 13:00 × 0.80 | 10:24 | Are the high values easier to print? |
| Baseline trial | 13:00 × 1.00 | 13:00 | Does this produce your desired normal contrast? |
| Extended-development trial | 13:00 × 1.20 | 15:36 | Does the flat scene gain useful separation? |
Do not label 10:24 “N−1” or 15:36 “N+1” until your tests demonstrate those changes. If your personal N becomes 12 minutes, calculate from 12 minutes instead. Do not transfer these times to another developer, dilution, temperature, or processing method.
N+ development is not the same objective as pushing. Pushing usually combines a higher EI with extra development after reduced exposure. Zone expansion here starts with sufficient shadow exposure and seeks a different contrast relationship. Extra development cannot make a badly underexposed shadow equivalent to a properly exposed one.
8. Test your own exposure index and development
Choose a stable scene with dark textured material, a middle tone, and pale textured material. Avoid rapidly changing clouds. Keep your lens, meter, camera, film, and processing method consistent.
First test shadow exposure. Make a Zone III placement at EI 400. Make additional frames with one-third stop and one stop more exposure; label them as EI 320 and EI 200 equivalents. Process them together at the baseline time. Compare shadow texture through a consistent print or scan. Select the least exposure that reliably delivers the shadow detail you need, with a practical margin for field use.
Then test development. At your selected EI, repeat the same scene and exposure on separate rolls, removable backs, or sheet-film holders. Process separate matched samples at the baseline, shorter, and longer times. A single intact roll cannot receive three different development times. Cutting exposed roll film into test sections requires complete darkness and a planned method; separate short rolls are easier for a beginner.
For optical printing, compare at the same paper grade with print exposure adjusted to a consistent low-value reference. Inspect whether the important high value reaches the intended brightness with the desired texture. For scanning, disable automatic contrast and tonal correction, use consistent capture settings, and compare through the same inversion and tone curve. Automatic normalization can hide the very differences you are trying to study.
An advanced densitometer test can establish a Zone I density around 0.10 above film base plus fog as a traditional starting criterion for personal speed. That does not replace checking real Zone III texture. Develop your final N and N± times for the actual enlarger, paper, or scanning system you use, and verify shadow performance again after substantial development changes.
9. Make it work with 35mm and 120 rolls
You can place the exposure separately for every frame, but development affects the entire roll. This is the central limitation of roll-film Zone System work.
For your first mixed-lighting roll, expose important shadows carefully and use normal development. Handle remaining frame-to-frame contrast differences with paper grade, dodging, burning, or scan adjustments. As you gain experience, dedicate a roll to scenes with similar contrast, or use separate bodies or interchangeable backs for planned development groups.
Sheet film gives the most direct frame-by-frame development control, but the exposure lesson does not require a view camera. If a lab develops your film, ask whether it will follow a specified, tested process. “Pull one stop” is not necessarily the same instruction as your calibrated N−1.
10. Why this makes you a better photographer
The first benefit is more dependable negatives. You stop hoping that a general meter reading will preserve an important dark subject. The second is easier printing or scanning because you have considered highlight density before developing.
The deeper benefit is visual judgment. You begin noticing where light separates objects, where dark shapes merge, and which highlights carry the viewer’s attention. You also learn when detail is unnecessary. A deep silhouette, brilliant reflection, or delicate low-contrast landscape can be exactly right.
The Zone System does not improve a weak composition by itself. It gives your visual decisions a repeatable technical foundation. The goal is not to force every photograph to include every zone. It is to make the tones serve the photograph.
Field checklist
- Visualize the final image and choose the darkest area needing texture.
- Set your tested EI; start with 400 for this exercise.
- Spot-meter the chosen shadow and give two stops less than that reading to place it on III.
- Meter the important highlight without replacing the camera exposure.
- Count the stop difference and predict its placement.
- Choose N or a tested adjustment based on the desired output and the needs of the whole roll.
- Record settings, subject readings, and planned development.
- Process consistently, evaluate the finished print or scan, and refine one variable at a time.
For the first exercise, work without filters and avoid long exposures. Later, account for filter factors and film reciprocity behavior before finalizing exposure; those changes can also affect contrast and require additional testing.
Sources and further reading
Technical information checked October 13, 2026. Publication dates on manufacturer PDFs may be older than the access date; these are the documents currently linked by the manufacturer.
- ILFORD HP5 PLUS product information — current film, formats, speed, and general characteristics.
- ILFORD HP5 PLUS technical information — development baseline and agitation. The trial percentages in this article are not ILFORD N± specifications.
- ILFORD powder developers technical information — ID-11 mixing and dilution.
- Reveni Labs Spot Meter manual — reflected metering, stops, and zone assignment.
- John Finch: Expose for the shadows, develop for the highlights — development as contrast control. His suggested time factors differ from the exploratory brackets used here, illustrating why personal calibration matters.
- Ansel Adams, The Negative — further reading on visualization, film testing, and the Zone System.